Author: admin-blue

  • Roof Insurance Claim Checklist After a Carolina Storm

    Roof Insurance Claim Checklist After a Carolina Storm

    A roof insurance claim checklist helps homeowners respond in the right order. The goal is to protect the property, document what happened, understand the policy, and give the insurer enough information to evaluate the loss. Acting quickly matters, but rushing into permanent repairs or signing a contract before the damage is reviewed can create avoidable problems.

    The steps below explain how the roof insurance claim process commonly works in North Carolina and South Carolina. Coverage, deductibles, deadlines, and payment terms vary by policy, so the insurance contract and the carrier’s written claim decision remain the controlling documents.

    Does Homeowners Insurance Cover Storm-Damaged Roofing?

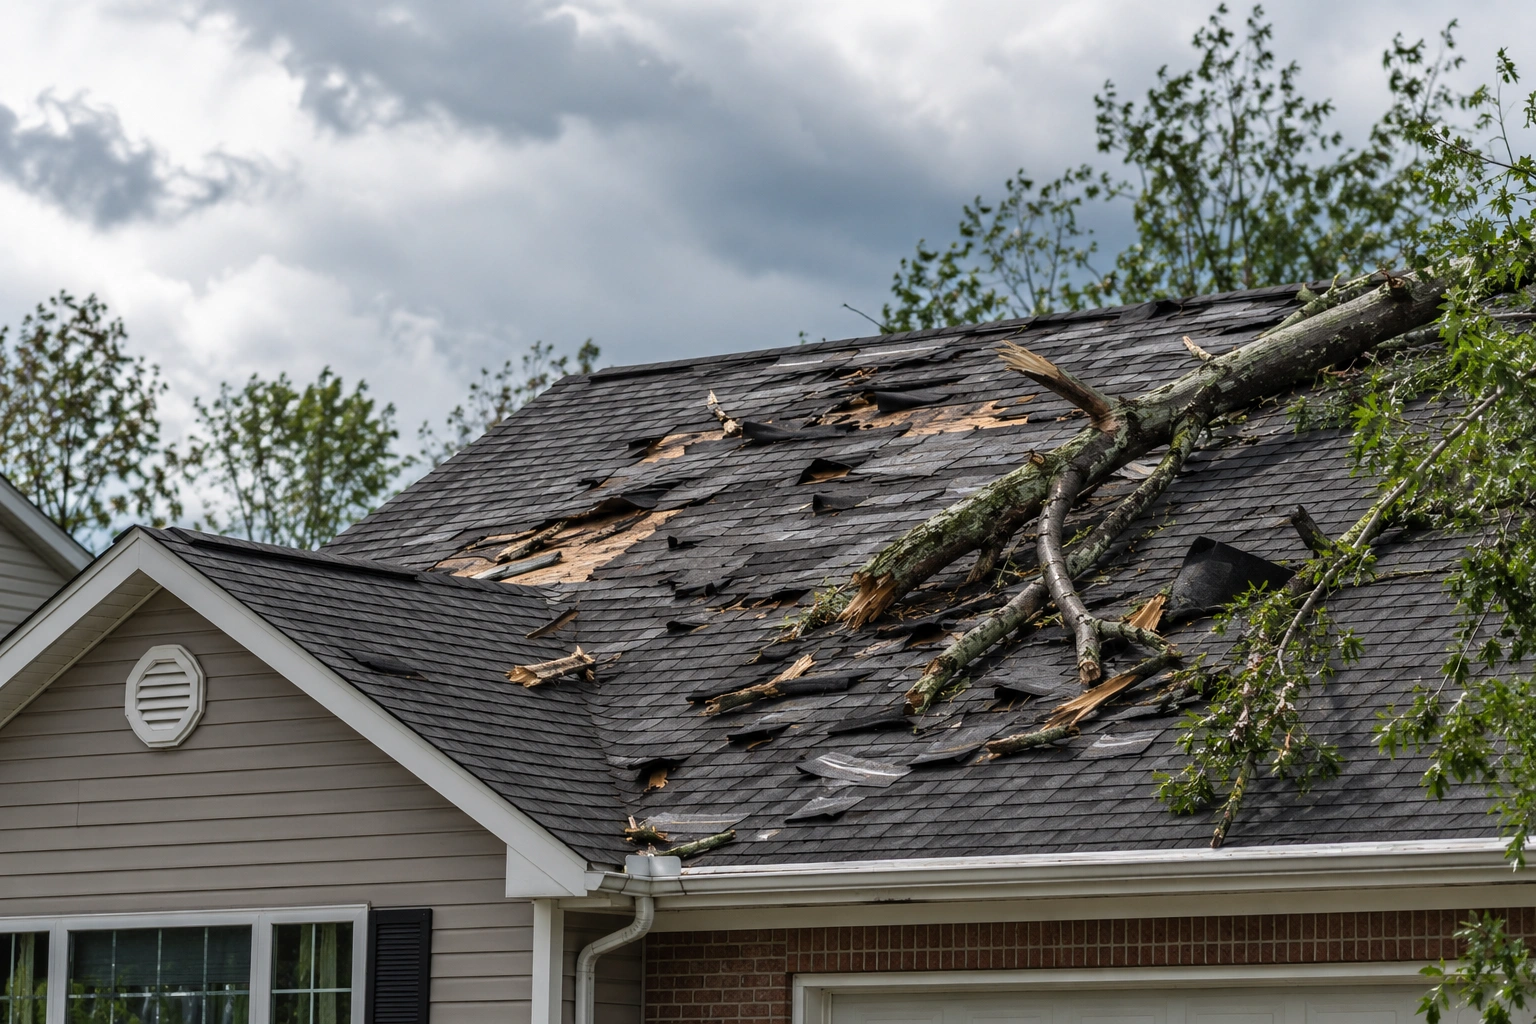
    Homeowners insurance may cover roof damage caused by a sudden event such as wind, hail, falling debris, or a tree strike. Coverage is not automatic simply because damage appeared after bad weather. The insurer will look at the cause of loss, the condition of the roof, policy exclusions, applicable deductibles, and whether the damage occurred during the policy period.
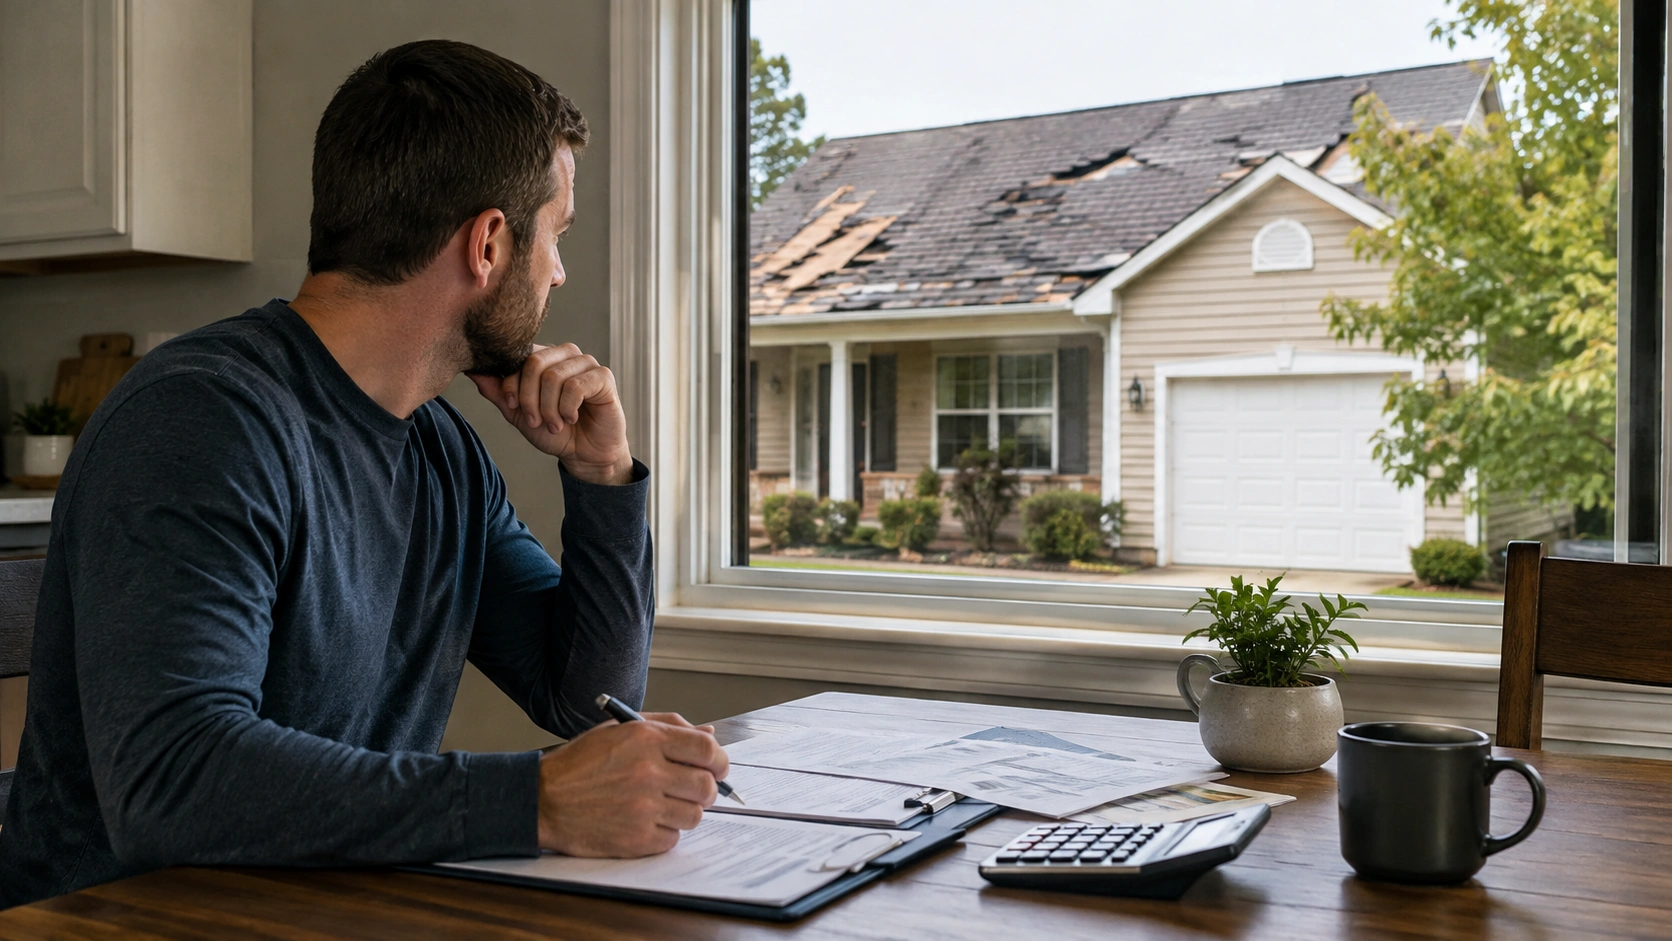
    Homeowner reviewing insurance paperwork while looking through a window at a storm-damaged roof

    Covered Events Depend on the Policy

    A standard policy often covers direct physical damage from certain wind and hail events, but coastal homeowners may have separate windstorm or hail coverage. North Carolina’s Department of Insurance advises policyholders to report a wind or hail loss to their homeowners insurer, even when a separate windstorm or hail policy also applies. roof damage can include:

    • Shingles torn away or lifted by wind
    • Hail impacts that crack, bruise, or remove protective granules
    • Damage from branches, trees, or airborne debris
    • Broken flashing, vents, ridge caps, or roof accessories
    • Interior water damage that results from a covered roof opening

    The exact cause matters. Rain entering through storm-created damage may be treated differently from water entering through an old, deteriorated roof that has leaked over time.

    Flood Damage Is a Separate Type of Claim

    Homeowners policies generally do not cover flood or rising water damage. South Carolina’s Department of Insurance states that standard homeowners insurance does not include flood damage, including storm surge, while North Carolina’s Department of Insurance gives the same warning for flood and rising water claims. Separate flood insurance may be needed. ion becomes important when a storm causes both roof damage and ground-level flooding. Wind damage to the roof may fall under one policy, while flood damage to lower floors or contents may involve a separate flood claim.

    Maintenance and Gradual Deterioration Are Commonly Disputed

    Insurance is generally intended for sudden, accidental losses, not the normal cost of maintaining an aging roof. Worn shingles, long-term leaks, rot, rust, poor installation, and deferred maintenance may not be covered. A storm can also expose an older problem rather than create a new one.

    Imagine a roof with deteriorated flashing that has allowed small amounts of moisture into the attic for months. A heavy storm makes the leak noticeable inside the home. The insurer may investigate whether the storm created new damage or merely revealed a pre-existing condition.

    Roof Age Can Affect the Amount Paid

    Some policies settle covered roof damage at replacement cost, while others use actual cash value, which may account for age and depreciation. In a replacement-cost claim, the insurer may initially pay the depreciated amount and release recoverable depreciation after completed repairs and receipts are submitted. North Carolina’s Department of Insurance recommends confirming exactly how the policy handles replacement cost and recoverable depreciation. a’s Department of Insurance also advises homeowners to check whether an older roof is covered at replacement cost or actual cash value. ductible as well. Wind, hail, named-storm, or hurricane deductibles may differ from the standard all-perils deductible. The deductible is normally the homeowner’s share of a covered loss, not an amount paid directly to the contractor before the claim is reviewed.

    Immediate Steps After Discovering Roof Damage

    The first priority is safety. A damaged roof can have loose materials, unstable decking, hidden electrical hazards, and slippery surfaces. Homeowners should inspect from the ground or from a safe interior location rather than climbing onto the roof.
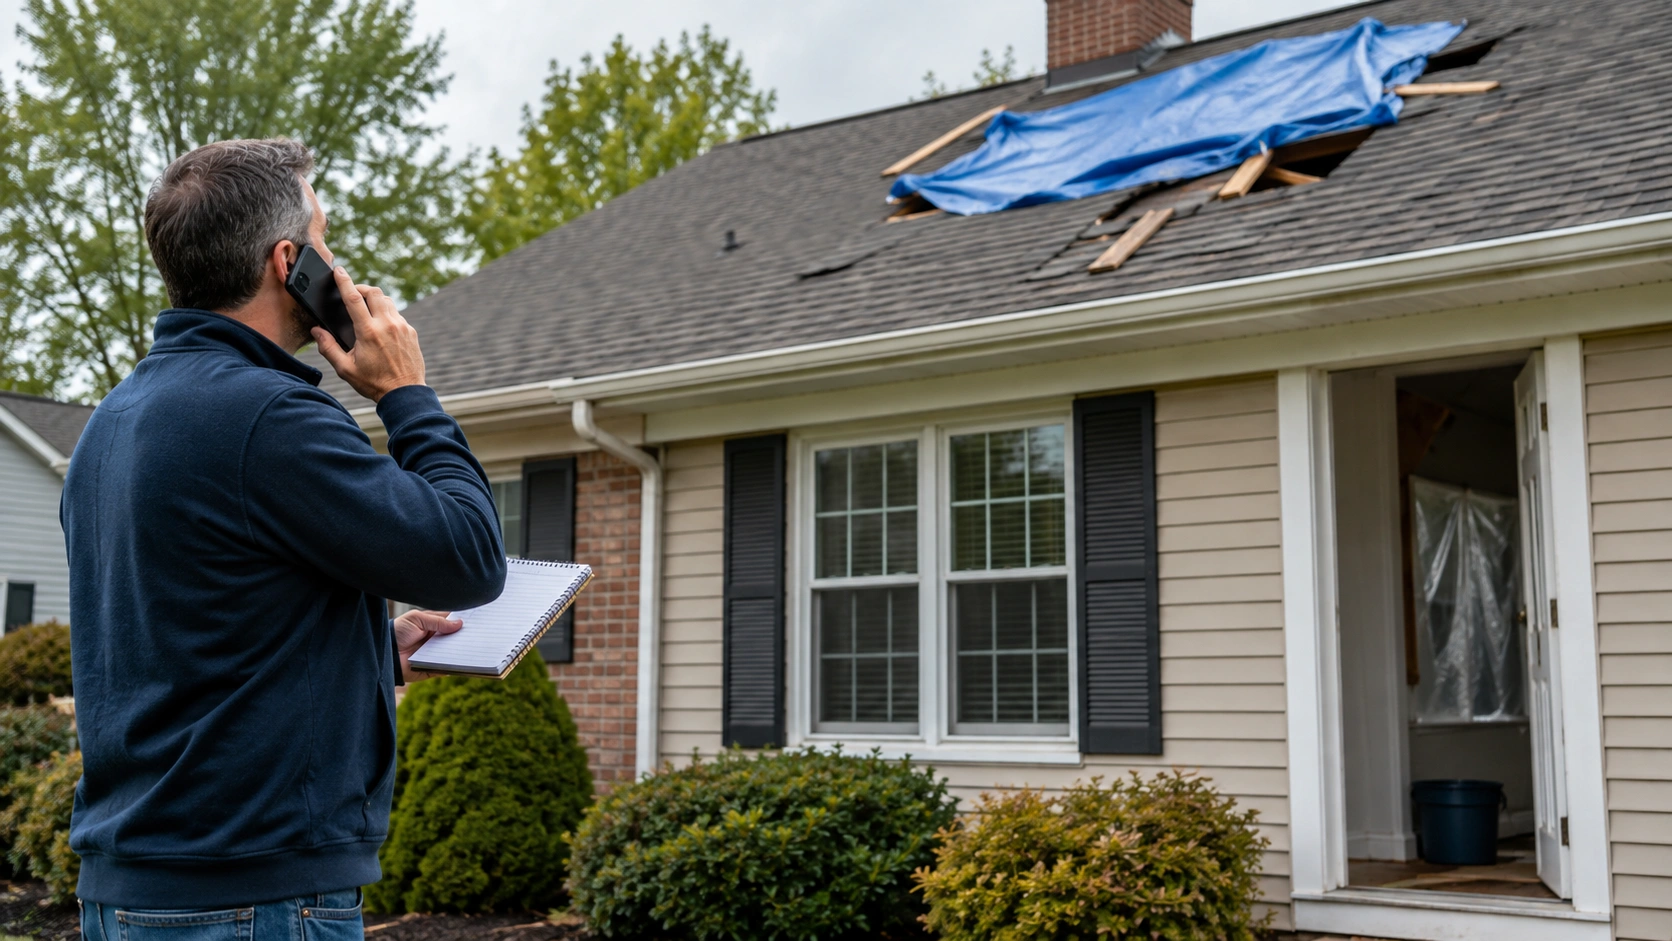
    Homeowner reporting roof damage while a temporary blue tarp protects the storm-damaged area

    Protect People Before Protecting Materials

    Move family members and pets away from rooms with sagging ceilings, active water entry, broken glass, or exposed wiring. If a tree has struck the structure, part of the roof has collapsed, or electrical service is affected, contact emergency services or the appropriate utility before entering the area.

    From a safe location, look for:

    • Missing or displaced shingles
    • Tree limbs resting on the roof
    • Damaged gutters or downspouts
    • Pieces of roofing material on the ground
    • Water stains, wet insulation, or dripping ceilings
    • Daylight visible through the attic or roof deck

    Prevent Additional Damage Without Making Permanent Changes

    Most policies require the homeowner to take reasonable steps to prevent further loss. That may involve emergency tarping, placing containers under active leaks, moving belongings away from water, or arranging temporary board-up work. North Carolina and South Carolina insurance guidance recommends temporary protection and keeping the related receipts. large sections of roofing, discard damaged materials, or authorize permanent reconstruction before the insurer has had a reasonable opportunity to inspect, unless delaying the work would create a safety emergency. Photograph the condition before and after any temporary repair.

    Save Every Storm-Related Receipt

    Keep invoices and receipts for tarps, emergency labor, temporary lodging, water extraction, tree removal, and other necessary expenses. Coverage for each expense depends on the policy, but missing documentation can make reimbursement harder to evaluate.

    Create one folder for the entire claim. Include photographs, videos, claim emails, contractor reports, estimates, receipts, names of representatives, and notes from every phone call.

    Roof Insurance Claim Checklist

    Use this checklist to organize the process from the first inspection through the final payment.

    Roof insurance claim checklist beside storm damage photos, roofing samples, receipts, and claim documents

    The sequence may change when emergency conditions require immediate work, but each item should be addressed.

    1. Review the insurance policy. Find the declarations page, roof settlement terms, deductible, exclusions, endorsements, and claim-reporting instructions.
    2. Photograph visible damage. Capture wide views and close views of the roof, yard, siding, gutters, windows, attic, ceilings, and damaged belongings.
    3. Document the storm date. Record when the storm occurred, when damage was first noticed, and what conditions were observed.
    4. Arrange temporary protection. Stop active water entry when it can be done safely, and keep receipts for emergency work.
    5. Schedule a professional roof inspection. Ask for photographs, written findings, affected roof components, and a recommended repair scope.
    6. Notify the insurance provider. Report the loss using the carrier’s required method and obtain a claim number.
    7. Obtain a written roofing estimate. The estimate should describe materials, labor, removal, disposal, flashing, ventilation, accessories, and code-related work where applicable.
    8. Prepare for the adjuster visit. Organize the policy information, storm photos, inspection report, receipts, and estimate.
    9. Review the insurer’s claim summary. Compare the covered scope, measurements, material allowances, depreciation, deductible, and excluded items with the observed damage.
    10. Ask questions in writing. Request an explanation for missing items, denied components, or differences between the insurer’s scope and the contractor’s estimate.
    11. Select a qualified roofing contractor. Review licensing, insurance, local references, contract terms, warranties, and the exact work included.
    12. Keep documents through completion. Save final invoices, change orders, photographs, proof of payment, permits, inspection records, and warranty documents.

    A checklist does not guarantee coverage or approval. It does, however, reduce confusion and create a clear record of what happened, what was inspected, and how the property was protected.

    How to Document Roof Damage for an Insurance Claim

    Strong documentation shows the condition of the property without asking the homeowner to diagnose the technical cause. The best record combines exterior photographs, interior evidence, storm information, and professional inspection findings.

    Homeowner reviewing roof damage documents, receipts, and photos for an insurance claim

    Start With Wide Views, Then Move Closer

    Take wide photographs of every side of the home before focusing on individual areas. Wide views help establish location and context. Close photographs can then show missing shingles, displaced flashing, dents, impact marks, punctures, or fallen debris.

    Use a consistent path around the property. Photograph the front, right side, rear, and left side, then capture detached structures and surrounding trees. Do not climb onto the roof simply to obtain a closer image.

    Record Related Exterior Damage

    Hail and wind rarely affect only one roof surface. Photograph dents or marks on gutters, downspouts, siding, window screens, metal vents, fencing, garage doors, outdoor equipment, and soft metals. These areas can help establish the storm pattern, although the insurer will still determine whether each item is covered.

    Leave fallen branches or damaged materials in place when safe to do so until they have been documented. If debris must be moved for safety, take photographs first and save representative damaged materials when practical.

    Gutters and downspouts should also be photographed closely. Hail can leave dents, while wind and falling branches may pull sections away from the fascia or affect drainage. When this damage is present, professional Gutter Services may be needed alongside the roofing work to restore proper water flow around the property.

    Document Interior Moisture Carefully

    Inside the home, photograph ceiling stains, bubbling paint, wet drywall, damp insulation, attic moisture, and damaged belongings. Include a wide photograph of the room and a close photograph of the affected area. Note when the moisture first appeared and whether it changed during later rainfall.

    A moisture stain does not prove that the roof itself is the source. Plumbing, HVAC condensation, siding, windows, and other building components can also allow water inside. A professional inspection should trace the likely entry point rather than assuming every ceiling stain is roof damage.

    Keep a Written Claim Timeline

    A simple timeline can prevent conflicting dates later. Record:

    • Date and approximate time of the storm
    • Date the damage was discovered
    • Date temporary repairs were completed
    • Date the insurer was notified
    • Date of the contractor inspection
    • Date of the adjuster visit
    • Dates estimates, decisions, payments, or requests were received

    North Carolina’s Department of Insurance recommends providing a summary of what happened, the extent of the claimed damage, available photographs or videos, and cost estimates when reporting a claim. Roof Inspection for the Insurance Claim

    A professional roof inspection can identify damage that is not visible from the yard and separate storm-related conditions from normal wear. The inspection should help the homeowner understand the roof’s condition, but it should not promise that the insurer will approve a claim.

    What the Roofer Should Inspect

    The contractor may examine shingles or other roof coverings, ridge caps, flashing, pipe boots, vents, valleys, gutters, roof edges, decking conditions, attic moisture, and visible interior leaks. The inspection may also note storm marks on siding, fascia, soffits, windows, and other exterior components.

    Roof type matters. Hail damage on asphalt shingles may appear as bruising, granule loss, exposed mat, or fractured reinforcement. Metal roofing can show dents, seam movement, coating damage, punctures, or displaced fasteners. Tile and slate may crack or shift without producing an immediate interior leak.

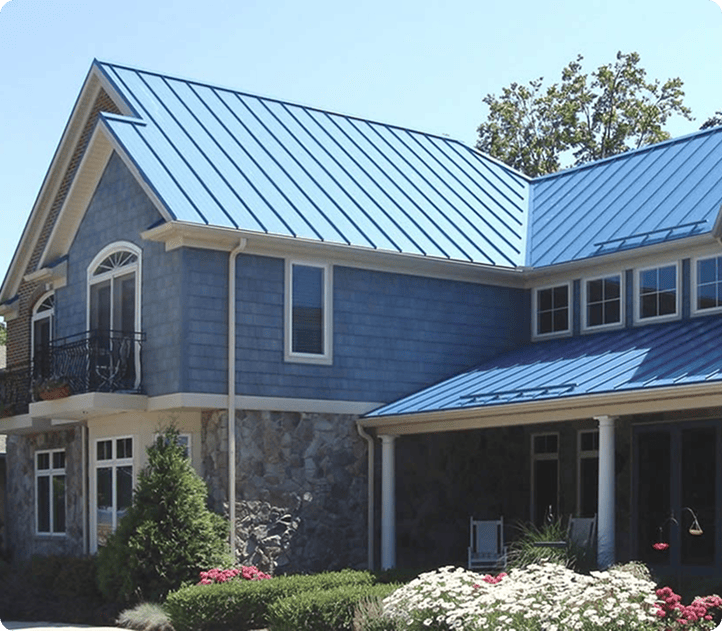
    The inspection approach may also depend on the roofing material. Storm damage to asphalt shingles can require professional Shingle Roofing repairs, while dents, loose seams, punctures, or displaced panels may require specialized Metal Roofing work. A complete Roofing Services assessment should also include flashing, ventilation, valleys, roof edges, and other components that help keep water outside the home.

    What a Useful Inspection Report Contains

    A clear report should identify the inspected areas, date of inspection, visible conditions, photographs, roof measurements when available, affected components, and recommended repair approach. It should distinguish observed facts from opinions and avoid claiming that a specific item is covered by insurance.

    A roofing estimate and an inspection report serve different purposes. The report explains what was found. The estimate describes the work and expected price to repair or replace the affected components.

    Contractor Inspection Versus Insurance Inspection

    The roofing contractor evaluates the building and prepares a repair scope. The insurance adjuster evaluates the claimed loss under the policy. Those roles overlap during the physical inspection, but they are not the same.

    A contractor can point out damage, explain construction requirements, provide measurements, and answer repair questions. The insurer decides coverage, depreciation, deductible application, and the amount payable under the policy.

    Homeowners should be cautious when anyone promises a guaranteed approval or describes an insurance-funded roof as “free.”

    How to File a Roof Insurance Claim

    Filing a roof damage insurance claim begins with notifying the insurer, not with completing permanent repairs. The carrier will open a claim, assign a claim number, request information, and explain the next steps.
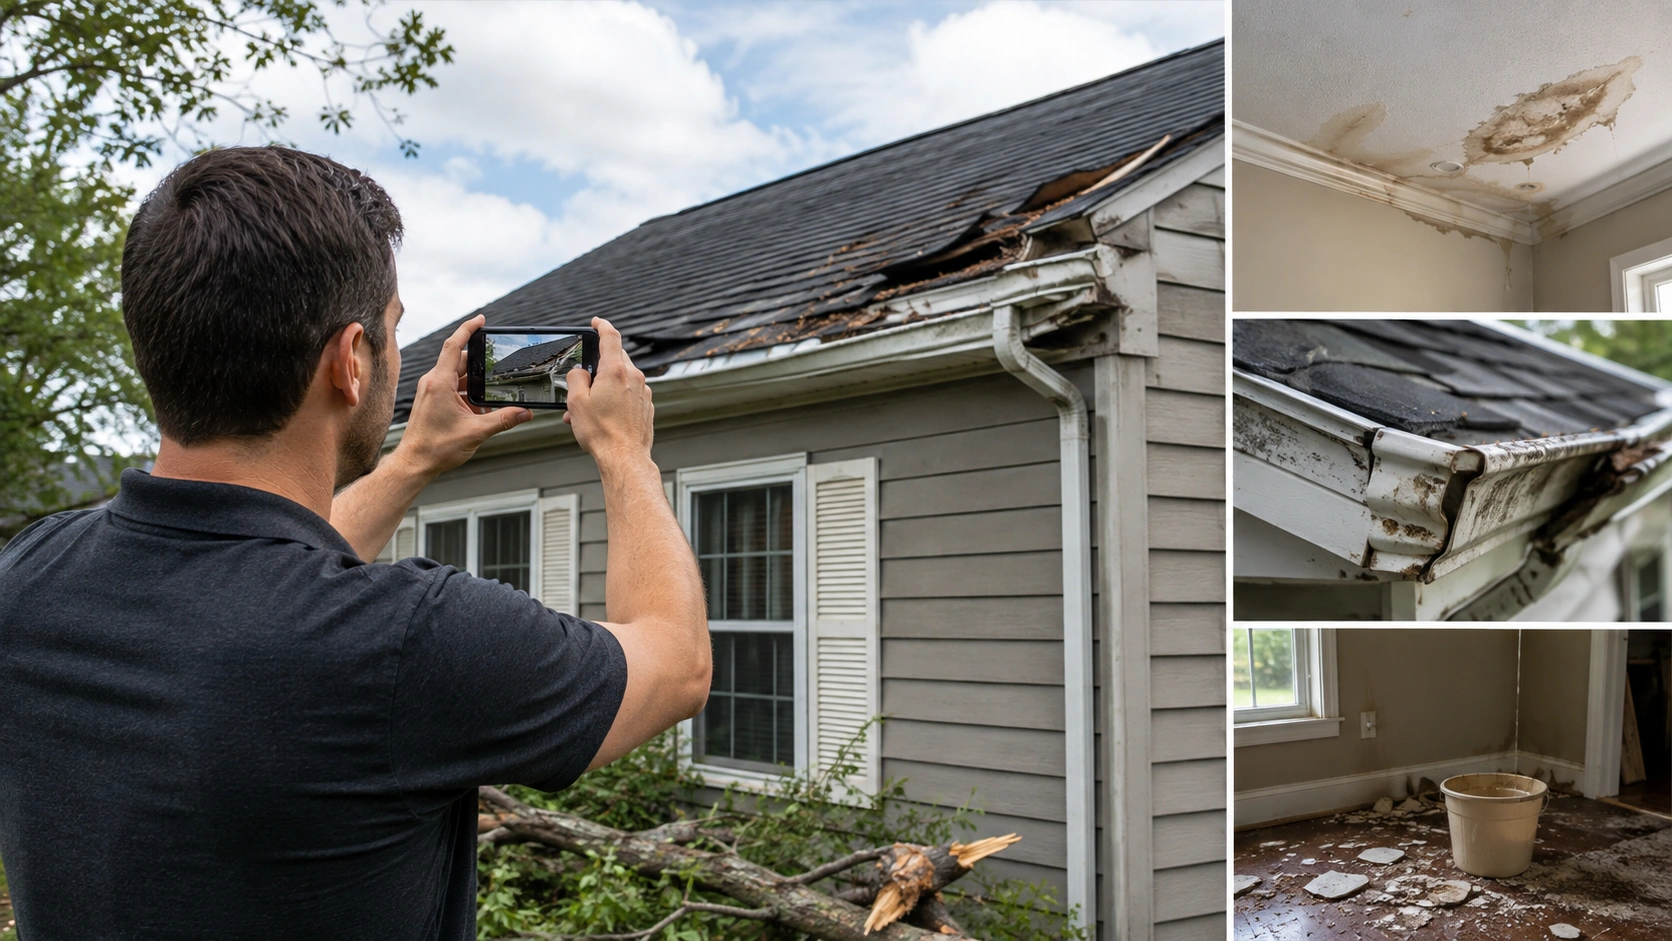
    Homeowner photographing roof, gutter, ceiling, and interior water damage for an insurance claim

    Step 1: Gather the Basic Information

    Have the policyholder’s name, property address, policy number, date of loss, description of the event, photographs, temporary repair receipts, and contractor contact information available. If the policy number cannot be located, the agent or insurer may be able to find the policy using identifying information. you know without guessing. A useful report might say that high winds occurred, shingles were found in the yard, and water appeared near an upstairs ceiling. Avoid stating that the entire roof requires replacement before an inspection supports that conclusion.

    Step 2: Report the Claim Through the Required Channel

    Claims may be reported by phone, online portal, mobile application, email, or through an insurance agent. Ask for the claim number, assigned representative, preferred method for sending documents, and any deadlines listed in the claim instructions.

    Write down the date, time, representative’s name, and a summary of the conversation. Follow important phone calls with an email so the record is easy to retrieve.

    Step 3: Submit Supporting Documents

    Send clear photographs, the professional inspection report, temporary repair invoices, and the roofing estimate. Label files by area, such as “rear slope missing shingles” or “attic moisture below chimney,” instead of uploading a group of unnamed images.

    Provide requested information promptly, but keep copies of everything. Do not send original receipts or documents unless the carrier specifically requires them and you retain a copy.

    Step 4: Continue Protecting the Property

    A filed claim does not remove the homeowner’s responsibility to prevent reasonable additional damage. Monitor temporary tarps, remove standing water where safe, and report new damage or worsening leaks. Document changes with dated photographs.

    Step 5: Review the Written Decision

    The insurer may approve the claim, approve part of it, request more information, or deny coverage. Read the written explanation and compare it with the policy, adjuster estimate, contractor report, and observed damage.

    Ask the carrier to explain unclear line items, depreciation, exclusions, or omitted areas. Important questions and responses should be kept in writing.

    What Happens When the Insurance Adjuster Visits?

    The adjuster’s inspection gives the insurer an opportunity to examine the reported damage. A prepared homeowner can make the visit more productive by providing organized documents and safe access to affected areas.
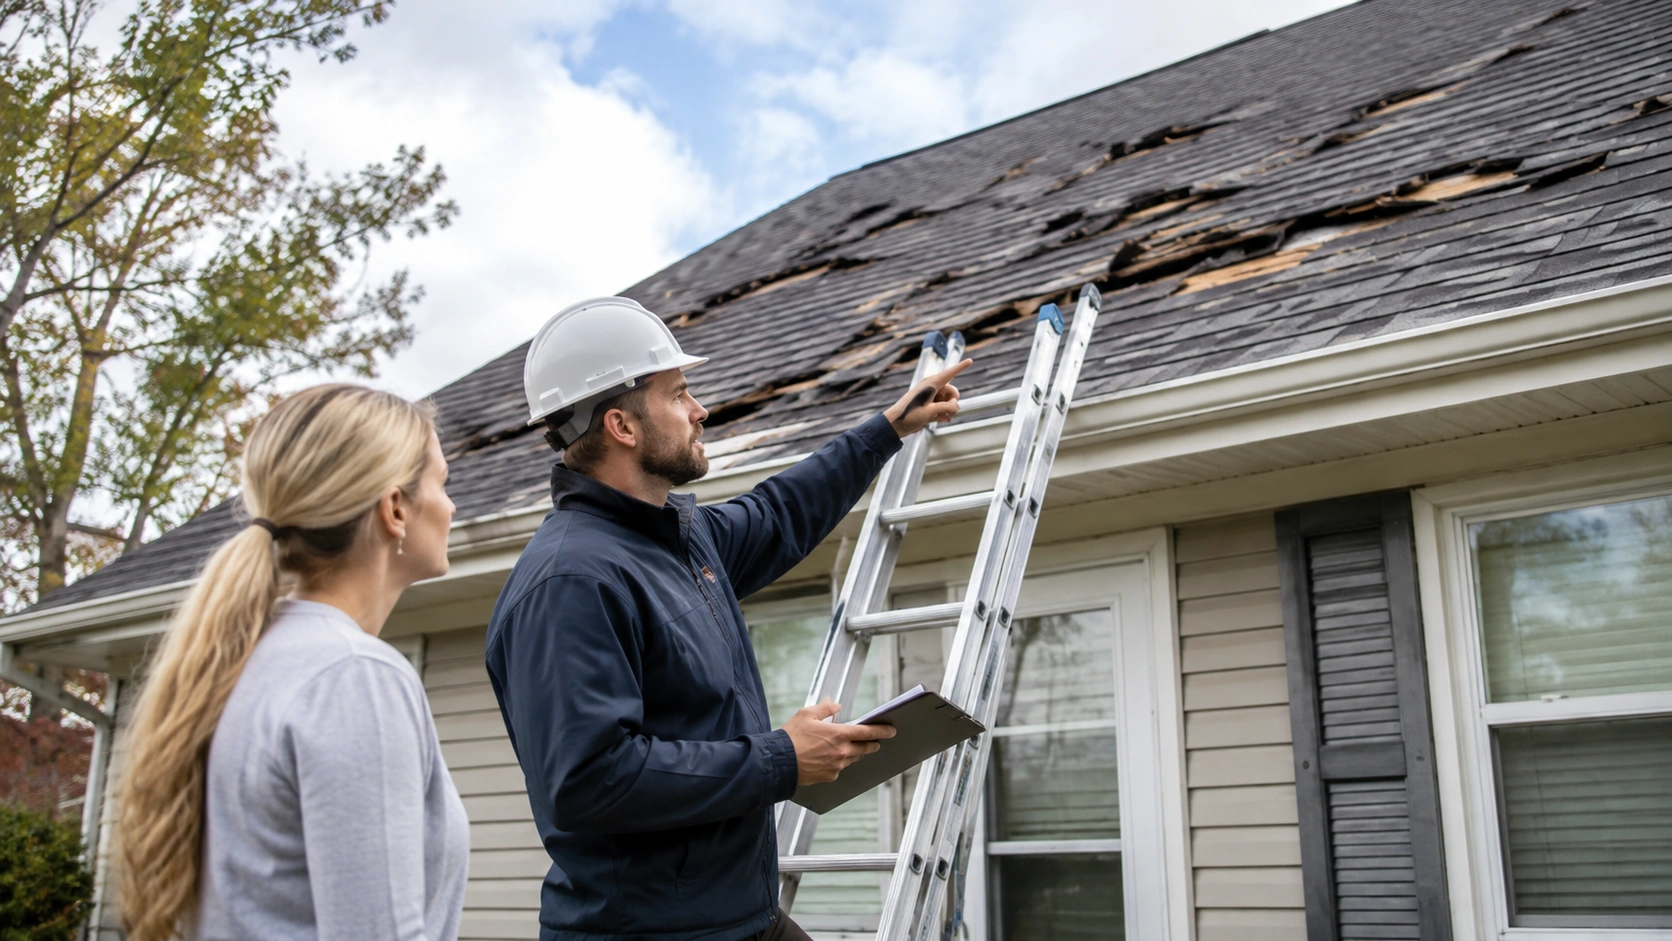
    Roof Insurance adjuster showing storm-related roof damage to a homeowner during an exterior inspection

    Prepare the Property and Paperwork

    Before the visit, gather the claim number, storm photographs, repair receipts, roof inspection report, contractor estimate, and a list of affected rooms or exterior components. Make the attic, garage, electrical panel, and interior leak areas accessible when safe.

    Do not conceal temporary repairs. Show the adjuster what was done, why it was necessary, and how the area looked before the work. Before-and-after photographs are useful when a tarp or emergency patch covers the original damage.

    Consider Having the Roofing Contractor Present

    A contractor who has inspected the property can identify roof sections, explain measurements, and show documented conditions. Ask the adjuster or carrier whether contractor attendance is permitted and coordinate the appointment in advance.

    The contractor should focus on construction facts rather than arguing policy interpretation. The adjuster may accept, question, or independently evaluate the contractor’s findings.

    What the Adjuster May Inspect

    The inspection may include roof surfaces, exterior elevations, gutters, attic areas, ceilings, interior finishes, detached structures, and damaged personal property. The scope depends on the reported loss and the carrier’s procedures.

    There is no single inspection length that applies to every claim. Roof size, access, weather, damage complexity, interior moisture, and the number of affected structures can all change how long the visit takes.

    Questions Worth Asking

    Ask practical questions that clarify the next step:

    • Do you need any additional photographs, estimates, or receipts?
    • Which areas were included in the inspection?
    • When should I expect the written scope or decision?
    • How will depreciation be handled?
    • What should I do if hidden damage is found during repairs?
    • Is there a process for submitting supplemental documentation?

    Avoid relying only on verbal comments made at the property. Wait for the carrier’s written coverage decision and estimate.

    Roof Repair or Replacement After the Claim

    A roof insurance claim may result in a localized repair, replacement of one or more slopes, or a full replacement. The proper scope depends on the physical damage, repairability, policy terms, local code requirements, and the availability of compatible materials.

    Homeowner discussing roof repair or replacement while reviewing storm damage photos and insurance documents

    When a Localized Repair May Be Reasonable

    Repair may be appropriate when damage is limited, the surrounding roofing remains serviceable, compatible materials are available, and the repair can restore the roof’s weather resistance. Examples include replacing a small group of wind-damaged shingles, repairing flashing, or replacing a damaged vent.

    A lower repair price does not automatically make repair the correct choice. The contractor should consider whether nearby shingles can be lifted without breaking, whether the underlayment or decking is damaged, and whether the repaired section can be integrated properly.

    When Replacement May Be Considered

    Replacement may be recommended when damage is widespread, multiple slopes are affected, the roof covering is brittle, matching materials are unavailable, repair would disturb surrounding areas, or code requirements affect the work. The insurer may still limit payment to the covered damage described in the policy.

    Homeowners should not assume that unavailable matching shingles automatically require payment for a complete roof. North Carolina’s Department of Insurance states that a homeowners policy generally covers direct physical damage and does not automatically require replacement of the entire roof solely because the original shingles cannot be matched. Codes and Concealed Damage

    Code-related work may include decking replacement, flashing details, ventilation changes, protective underlayment, fastening requirements, or other items required by the local authority. Coverage for code upgrades depends on policy terms, including any ordinance or law coverage.

    Hidden damage may appear after shingles or other roof materials are removed. The contractor should photograph concealed conditions before replacing them and notify the homeowner and insurer when the newly discovered work may affect the claim.

    Ask how supplemental estimates should be submitted before authorizing major changes.

    Understand the Payment Sequence

    The first payment may not be the final claim amount. South Carolina’s Department of Insurance notes that an initial check may be an advance rather than a final settlement, and additional damage may sometimes be submitted after discovery. ent-cost coverage applies, recoverable depreciation may be released after repairs are completed and required documents are provided. Confirm the carrier’s process before work begins so invoices, proof of payment, and completion photographs are collected correctly.

    Interior Repairs After a Roof Leak

    Roof damage sometimes affects more than the exterior surface. Water entering through missing shingles, damaged flashing, or roof openings can stain ceilings, soften wallboard, and damage interior finishes. Once the leak has been repaired and the area is completely dry, Drywall Services may be needed to replace damaged material, followed by professional Painting Services to restore the affected room.

    When water enters near a bathroom, homeowners should separate necessary storm repairs from optional Bathroom Remodelling work. The insurance carrier may evaluate damage caused by the covered event, while unrelated upgrades or design changes are generally handled as a separate home improvement project.

    Common Roof Insurance Claim Mistakes

    A claim can become harder to evaluate when the homeowner waits, loses evidence, authorizes extensive work too early, or assumes the contractor and insurer have identical roles.
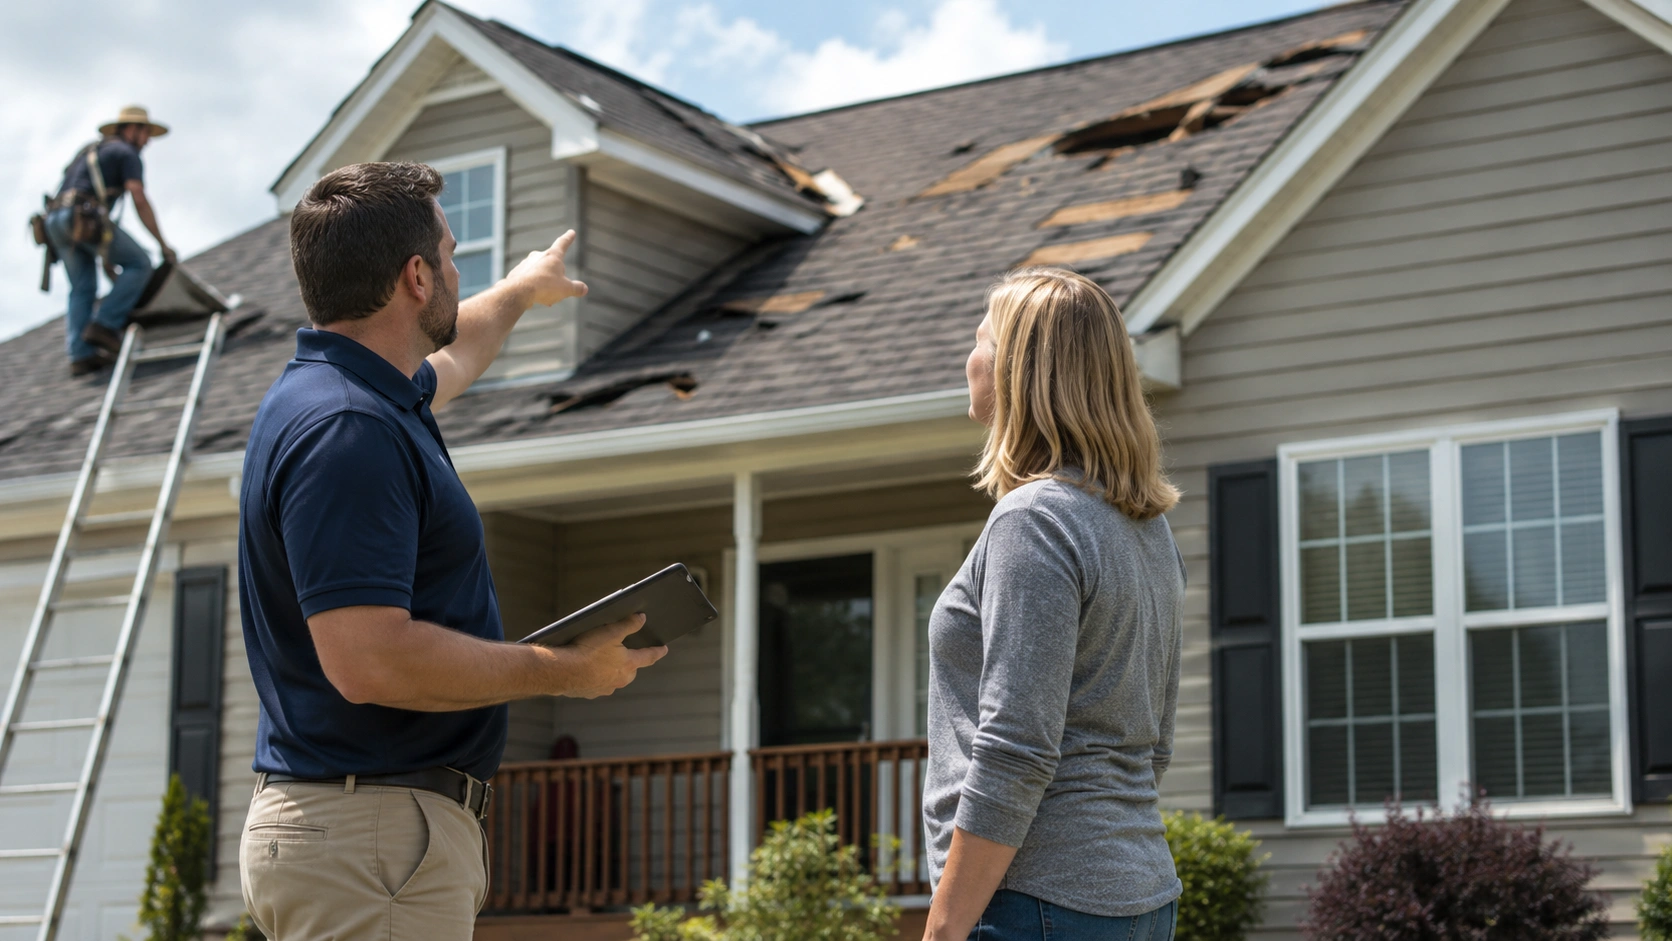
    Roofing professional explaining storm damage to a homeowner while another contractor inspects the roof

    Waiting Too Long to Report or Inspect Damage

    Storm damage is not always visible immediately, but unexplained delays can create questions about when the loss occurred or whether later weather contributed. Report known damage according to the policy and arrange an inspection when signs of damage appear.

    Do not assume that a lack of interior leaking means the roof is unharmed. Lifted shingles, damaged flashing, and hail impacts may exist before water becomes visible indoors.

    Discarding Damaged Materials

    Removed shingles, broken vents, damaged flashing, and fallen components may support the claim. Photograph them in place, save representative samples when practical, and ask the carrier before disposal if the materials are significant to the inspection.

    Safety and sanitation still come first. Do not retain wet, contaminated, sharp, or hazardous debris inside the home merely to preserve evidence. Detailed photographs may be the safer record.

    Completing Permanent Repairs Before Inspection

    Emergency work may be necessary, but replacing the roof before the insurer can inspect may remove evidence and create disagreement about the original condition. South Carolina’s disaster guidance advises homeowners not to contract for repairs beyond temporary work before agreement with the adjuster or agent. e permanent work is necessary for safety, document the reason, notify the carrier, photograph every stage, and preserve relevant materials where practical.

    Providing Incomplete Documentation

    A few distant roof photographs rarely tell the full story. Pair wide views with close views, label locations, include interior and exterior evidence, and maintain a timeline. Send the adjuster a clear packet rather than scattered text messages and unnamed files.

    Assuming Every Storm-Related Problem Is Covered

    A storm may create covered damage, uncover excluded wear, and cause flood damage that belongs under another policy, all at the same property. Ask the insurer to explain each decision in writing rather than treating the claim as a single yes-or-no question.

    Choosing a Contractor Based Only on Price

    A low estimate may omit flashing, ventilation, disposal, permits, decking allowances, code-related work, or manufacturer requirements. Compare scope, materials, insurance, licensing, workmanship terms, and communication practices, not just the total price.

    Be cautious with door-to-door contractors who demand immediate signatures, offer to absorb the deductible, request large cash payments, or promise guaranteed insurance approval. North Carolina’s Department of Insurance warns that storm-related repair scams often increase after major weather events.

    When to Request Roof Insurance Claim Assistance

    Blue Rock Roofing & Construction can inspect the roof, document visible storm damage, prepare a roofing estimate, and explain the repair options available for the property. Depending on the condition of the home, the project may involve Roofing Services, Gutter Services, interior drywall and painting repairs, or related exterior work.

    Homeowners planning improvements beyond the covered storm repairs can also discuss Custom Decks and Covered Porch and Pergola Installation as separate projects. Keeping insurance-related repairs and optional upgrades clearly separated makes estimates, contracts, and claim documentation easier to understand.

    Professional assistance may be useful when the source of damage is unclear, the roof cannot be inspected safely, the insurer requests a detailed estimate, or the contractor and adjuster have different repair scopes.

    Assistance should improve documentation and communication, not pressure the homeowner into filing a claim that may not be worthwhile.

    Blue Rock Roofing & Construction provides roof inspections, storm-damage assessments, photographs, written findings, and roofing estimates for homeowners in Fort Mill, Charlotte, and surrounding Carolina communities. The company also works alongside homeowners during the insurance claim process and can coordinate with the adjuster regarding the roof inspection and repair scope. tractor does not replace the insurance company or decide what the policy covers. Blue Rock’s role is to inspect the property, explain observed roofing conditions, prepare repair documentation, and complete approved roofing work under a clear contract.

    Consider scheduling an inspection when:

    • Shingles or roofing materials are found in the yard
    • Hail or high winds affected the neighborhood
    • Water stains appear after a storm
    • Gutters, vents, siding, or soft metals show impact marks
    • A branch or tree contacted the roof
    • The insurer requests a contractor estimate
    • The adjuster’s scope does not address visible construction conditions
    • Hidden damage appears after roofing materials are removed


    The most useful first step is an inspection that gives a straight answer about the roof’s condition. Not every storm mark requires a claim or a full replacement.

    Frequently Asked Questions

    How do roof insurance claims work?

    The homeowner reports a loss, provides documentation, protects the property from further damage, and allows the insurer to inspect. The carrier then applies the policy terms, deductible, exclusions, depreciation, and coverage limits to the documented damage.

    Approved work may be paid in one or more stages depending on the policy and repair process.

    How long do I have to file a roof damage claim?

    The deadline depends on the policy, the type of loss, and applicable law. Some policies require prompt notice rather than giving a simple universal number of days.

    Review the claim conditions and contact the insurer as soon as storm damage is discovered.

    Should I call a roofer or the insurance company first?

    Call emergency help first when the structure is unsafe or water is entering rapidly. For non-emergency conditions, a professional roof inspection can help determine whether visible damage exists before the claim is reported.

    Once known storm damage is identified, notify the insurer promptly and follow the policy’s instructions.

    Can I repair the roof before the adjuster visits?

    Temporary repairs are often appropriate when needed to prevent further damage. Photograph the original condition, keep receipts, and notify the carrier.

    Avoid permanent replacement before inspection unless waiting would create a serious safety or property risk.

    Does homeowners insurance cover roof leaks?

    Coverage depends on why the roof leaked. Water entering through sudden storm damage may be covered, while leaks caused by wear, faulty maintenance, long-term deterioration, or excluded water sources may not be.

    The insurer will investigate the cause and apply the policy terms.

    Will insurance pay for an entire roof replacement?

    It may when covered damage is widespread and replacement is required under the policy and repair conditions. In other cases, the insurer may pay for a localized repair or only the directly damaged area.

    Roof age, settlement method, matching materials, code requirements, and policy endorsements can affect the outcome.

    Can a roofing contractor meet with the adjuster?

    Often, yes, when the appointment is coordinated with the homeowner and insurer. The contractor can identify roof areas, explain measurements, show photographs, and discuss repair methods.

    The adjuster still evaluates the loss for the insurance company.

    What happens when roof damage is discovered late?

    Report it when discovered and explain why it was not visible earlier. Provide photographs, moisture records, inspection findings, and any evidence connecting the condition to the reported storm.

    The insurer may investigate the date and cause more closely, and coverage will depend on the policy and available evidence.

    A well-organized roof insurance claim begins with safety, documentation, and a careful inspection. Protect the home, preserve the evidence, read the policy, and keep important communication in writing.

    When professional roofing input is needed, choose a contractor who explains the physical condition clearly without promising an insurance outcome.
  • Roof Repair vs. Replacement: A Homeowner’s Guide | Blue Rock

    Roof Repair vs. Replacement: A Homeowner’s Guide | Blue Rock

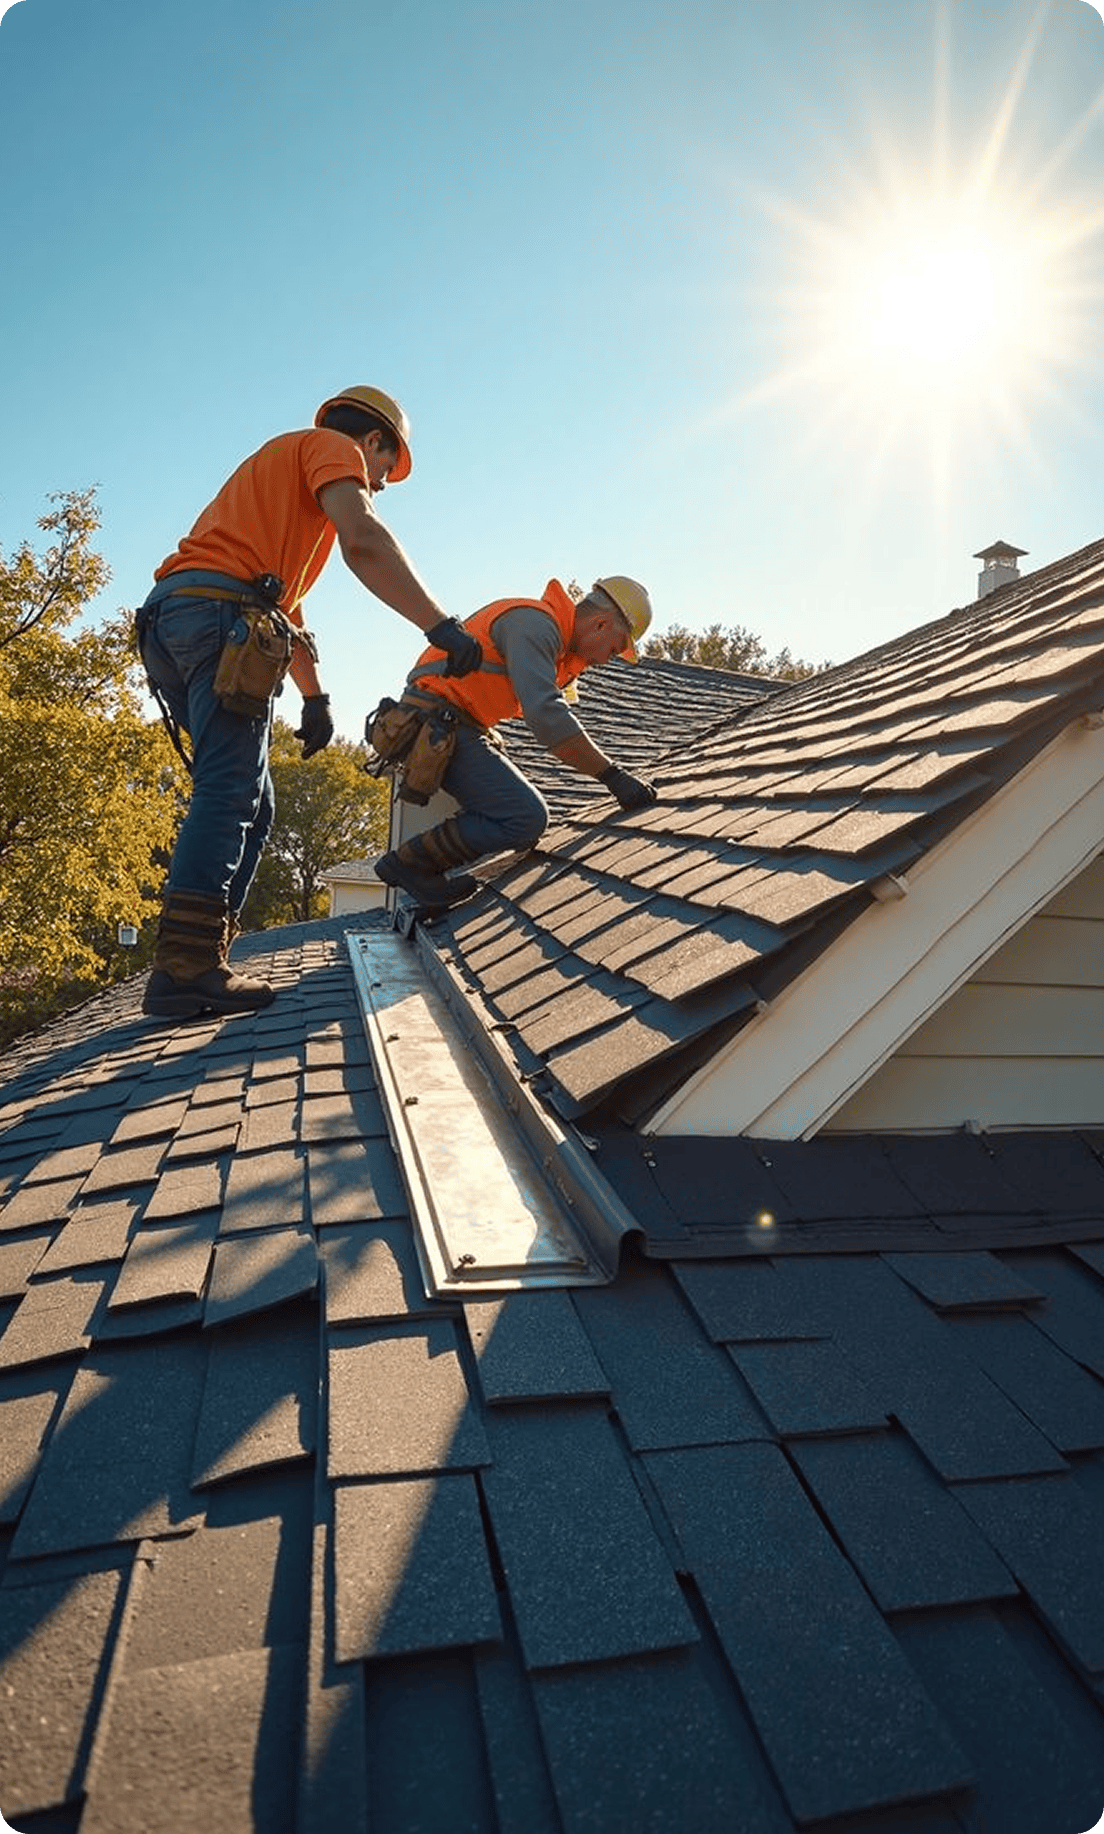
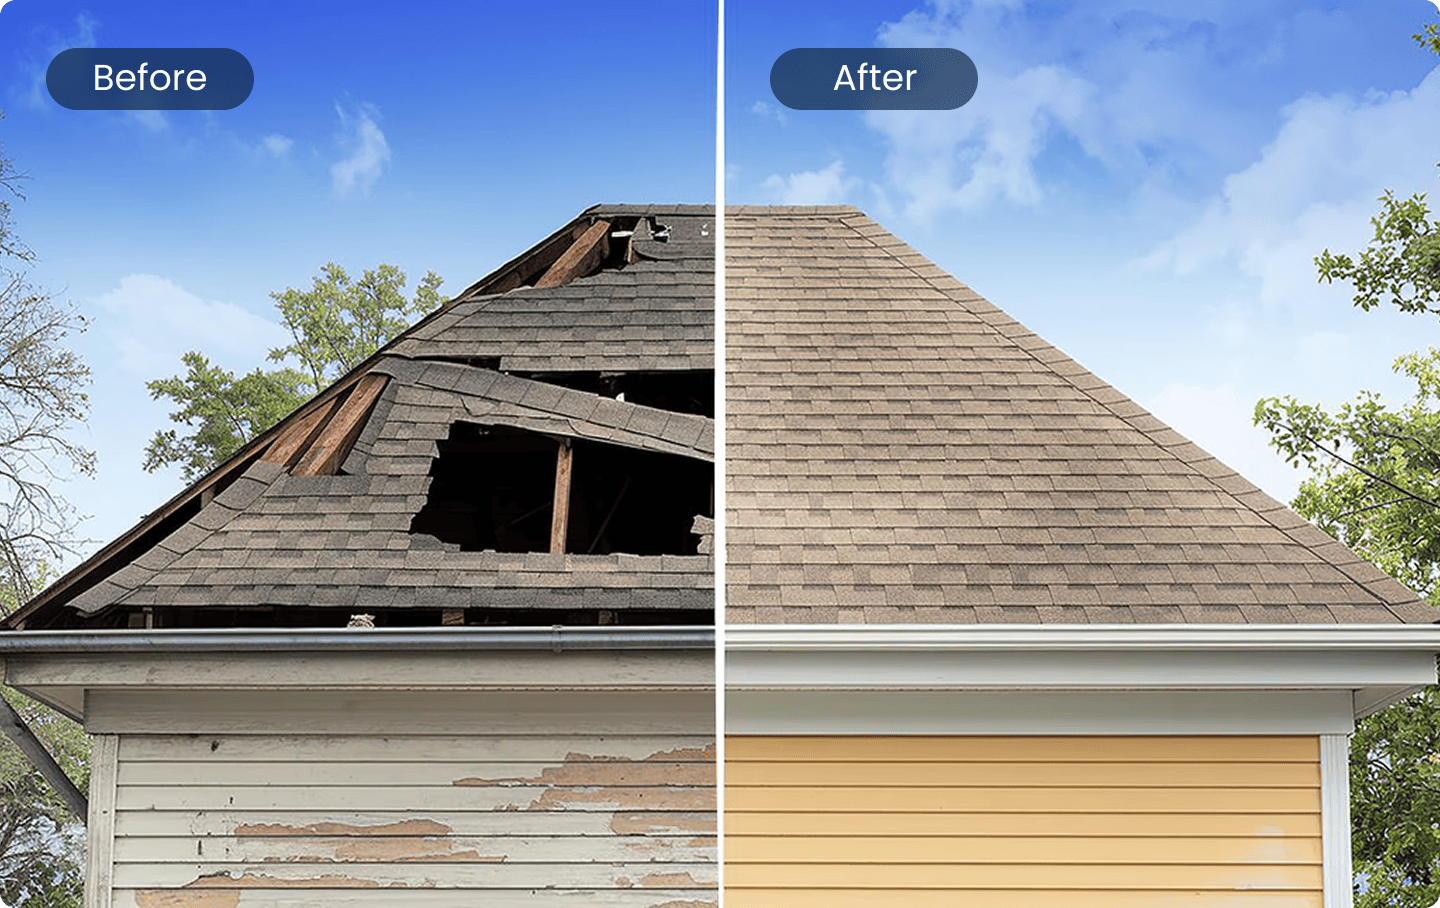
    Storm-damaged shingles replaced with new matching architectural shingles on a Fort Mill home.

    The roof repair vs replacement decision is one of the biggest calls a homeowner has to make. Get it wrong in either direction and you pay for it. Repair a roof that should have been replaced, and you will be fixing the same spot again next storm season. Replace a roof that only needed a patch, and you just spent $8,000 you did not need to spend. Nick has been working on roofs across Fort Mill and York County for over 25 years, and he has helped hundreds of homeowners make this call honestly.

    This guide walks through the signs that point toward repair, the signs that point toward replacement, and the factors that tip the scale. If you already know you need one or the other, you can jump straight to our roofing services page for an estimate.

    When Should You Repair Your Roof Instead of Replacing It?

    Roof repair makes sense when the damage is limited to a small area, the shingles are under their expected lifespan, and the underlying decking is solid. A few missing or cracked shingles, a minor flashing leak around a chimney, or a small storm-damaged section can usually be patched without replacing the whole roof. Repairs typically cost $300 to $1,200.

    We get calls every week from Fort Mill homeowners who think they need a full replacement when a repair will do the job. A good example is wind damage. We get strong thunderstorms in this area, and it is common for a few shingles to lift or blow off during a storm. If the rest of the roof is in good shape and the decking underneath is dry and solid, replacing those shingles costs a fraction of a new roof. Another common repair scenario is a flashing failure around a chimney or vent pipe. The flashing cracks, water gets in, and the homeowner assumes the whole roof is bad. Often the shingles are fine and only the flashing needs resealing or replacing.

    When Is Roof Replacement the Better Choice?

    Roof replacement is the better choice when shingles are past their expected lifespan, damage is widespread across multiple roof planes, or the decking underneath is soft or rotting. If your roof has been patched multiple times, if granules are filling your gutters, or if shingles are curling and cracking across the surface, replacement is the right call.

    According to CertainTeed’s warranty documentation, their Landmark PRO architectural shingles carry a lifetime limited warranty with 10 years of full SureStart protection that covers materials, labor, tear-off, and disposal if a manufacturing defect occurs. But “lifetime” in roofing does not mean forever. It means coverage for as long as the original homeowner owns the property. In real-world conditions across the Carolinas, architectural shingles typically last 20 to 30 years. Three-tab shingles last 15 to 20 years. If your roof is approaching or past those marks and showing problems, a full roof replacement is usually more cost-effective than repeated repairs.

    What Are the Top 5 Signs You Need a Roof Replacement?

    The five clearest signs that you need a roof replacement are age, widespread shingle damage, sagging roof decking, granule loss in gutters, and repeated leaks in multiple areas. If you notice two or more of these signs, it is time to get a professional inspection. Here is the list we use on every assessment.

    1. Your roof is over 20 years old.
    2. Shingles are curling, cracking, or missing.
    3. The roof deck sags or feels soft.
    4. Granules are filling your gutters heavily.
    5. Multiple leaks appear in different areas.

    Each of these signs tells a different story. Age means the shingles have reached the end of their useful life. Curling and cracking mean the asphalt is drying out and losing flexibility. A sagging deck means the structural plywood underneath is compromised, usually from long-term water intrusion. Granule loss means the protective surface of the shingle is wearing away. And multiple leaks mean the roof system is failing as a whole, not just in one spot.

    How Much Does Roof Repair Cost vs Replacement?

    Roof repair in Fort Mill typically costs $300 to $1,200 for minor fixes like replacing a few shingles or resealing flashing. Roof replacement costs $5,000 to $12,000 for an average home with architectural shingles. The cost depends on roof size, pitch, material quality, and how many layers need tear-off before the new roof goes on.

    The math matters. If you are spending $800 on repairs every year, after 5 years you have spent $4,000 on a roof that is still aging. At that point, you are throwing good money after a roof that will need replacement anyway. We tell homeowners to think about the 50 percent rule. If repair costs are approaching 50 percent of the cost of a new roof, replacement is the better financial decision. We are not going to push you toward replacement if a repair makes sense. Honestly, we turn down replacement jobs where a $400 patch would solve the problem. That is how we have built trust in this community for 25 years.

    How Does Roof Age Affect the Roof Repair vs Replacement Decision?

    Roof age is the single biggest factor in the repair vs replacement decision. If your shingles are under 15 years old, repairs are almost always worth it. If they are over 20 years old, replacement is usually the better investment. Between 15 and 20 years, the decision depends on the extent and frequency of damage.

    Here is how we break it down for homeowners. A 3-tab shingle roof under 15 years old with a single leak can almost always be repaired. An architectural shingle roof under 20 years old with isolated storm damage is also a good candidate for repair. But once you cross the 20-year mark, even architectural shingles start losing granules and drying out. We have inspected roofs in Charlotte and Gastonia that were 25 years old and still shedding water fine, but the shingles were so brittle that walking on them caused cracking. At that point, repairs become risky because you can cause more damage fixing the roof than the original problem.

    What Role Does Storm Damage Play in the Decision?

    Storm damage can shift the repair vs replacement decision because insurance may cover replacement if the damage is extensive. Hail damage, wind-lifted shingles, and fallen tree impacts are common in Fort Mill during storm season. If an insurance adjuster determines the damage affects more than a certain percentage of the roof, they may approve full replacement instead of repair.

    We work with homeowners and insurance adjusters regularly. After a major storm rolls through York County, we get dozens of calls. We inspect the roof, document everything with photos, and give you an honest assessment of whether you need a repair or a replacement. If the damage is limited to one slope, a repair usually works. If hail hit every slope, the adjuster will likely approve replacement. The National Roofing Contractors Association (NRCA) recommends getting three to four proposals from reputable contractors before deciding. We agree with that advice. Get multiple opinions, compare them, and choose the contractor who explains the work clearly.

    Can You Put New Shingles Over Old Ones?

    You can overlay new shingles over old ones, but we do not recommend it. Building code allows a maximum of two layers of asphalt shingles on a roof. However, overlaying hides underlying problems, adds weight to the roof structure, and shortens the lifespan of the new shingles. A full tear-off before replacement is always the better approach.

    We have torn off roofs in Rock Hill that had two layers of shingles, and the bottom layer was hiding rotting decking. The homeowner had no idea. Overlaying shingles is cheaper in the short term because you skip the tear-off labor and disposal fees. But you lose the chance to inspect the decking, fix any rot, and install new underlayment. The new shingles also do not lay flat over the old ones, which creates bumps and reduces wind resistance. In our experience, a roof that is overlaid will fail 5 to 7 years sooner than one that was torn off first. That is why we always recommend a full tear-off for any roof repair or replacement project.

    What Should You Ask a Contractor Before Deciding?

    Ask the contractor about the age and condition of your current shingles, whether the decking is solid, what the repair vs replacement cost comparison looks like, and whether they recommend a repair or replacement. Get the answers in writing. A contractor who cannot explain why they recommend one option over the other is not giving you honest advice.

    These are the questions we recommend asking:

    1. How old is my current roof?
    2. Is the decking underneath solid or rotting?
    3. How widespread is the damage?
    4. What does each option cost?
    5. How long will a repair last?

    The last question is critical. If a repair will only buy you two more years, that changes the math. If a repair will buy you five to seven years, it might be worth doing. We give every homeowner a realistic timeline for how long a repair will hold before replacement becomes necessary. No surprises, no guessing.

    Frequently Asked Questions About Roof Repair vs Replacement

    How long does a roof repair last compared to a replacement?

    A properly done roof repair can last 5 to 10 years if the surrounding shingles are in good condition. A full roof replacement with architectural shingles lasts 20 to 30 years. The lifespan of a repair depends on the age of the existing roof and whether the underlying decking and flashing are in good shape. Older roofs repaired near the end of their lifespan may only hold for a few years.

    Will my homeowners insurance cover roof replacement?

    Homeowners insurance typically covers roof replacement if the damage is caused by a covered peril like a storm, hail, or falling tree. It generally does not cover replacement due to age or normal wear and tear. Check your policy for specifics, and have a contractor document the damage with photos to support your claim. An adjuster will need to verify the cause of damage.

    How do I know if my roof decking is bad?

    Signs of bad roof decking include a sagging roofline, soft spots that feel spongy when walked on, and water stains on the underside of the decking visible from the attic. If you see dark spots, mold, or rot in the attic, the decking is compromised. A contractor can check the condition during an inspection by pressing on the wood and looking for give.

    How long does a roof replacement take?

    Most residential roof replacements in Fort Mill take one to two days for an average-sized home. Larger homes or homes with steep pitches may take three days. The crew tears off the old shingles, inspects and replaces any damaged decking, installs new underlayment and flashing, and lays the new shingles. Weather can extend the timeline, but a professional crew monitors the forecast and tarps the roof overnight.

    What is the best time of year to replace a roof?

    Fall and spring are the best seasons for roof replacement in Fort Mill. Temperatures are moderate, humidity is lower, and afternoon thunderstorms are less frequent. Summer is doable but requires careful scheduling around storms. Winter is possible but cold temperatures can make shingles brittle and harder to seal properly. Plan ahead and book your contractor in the off-season for faster scheduling.

    What type of shingles should I choose for replacement?

    Architectural shingles are the best choice for most Fort Mill homes. They last 20 to 30 years, resist wind up to 110 to 130 mph, and look better than 3-tab shingles. Premium dimensional or designer shingles last 30 to 50 years but cost significantly more. Metal roofing is another option that lasts 40 to 70 years and handles Carolina storms well, though it costs more up front.

    How do I find a trustworthy roofing contractor?

    Look for a contractor with a physical local address, proof of insurance, verifiable references, and at least five years of experience in your area. Ask whether they pull permits for the work and whether they offer a workmanship warranty. Avoid contractors who knock on your door after a storm and pressure you to sign immediately. A trustworthy contractor gives you time to decide and answers every question directly.

    Make the Right Call for Your Roof

    The roof repair vs replacement decision comes down to age, extent of damage, and cost. If your roof is under 15 years old with isolated damage, a repair is probably the right move. If it is over 20 years old with widespread problems, replacement saves you money in the long run. The key is getting an honest assessment from someone who will not push you toward the more expensive option if it is not necessary.

    Nick and the team at Blue Rock Roofing and Construction have been working on roofs across Fort Mill, Rock Hill, Charlotte, and Gastonia for over 25 years. We are a family-owned business that gives straight answers. Call us at (704) 266-0448 or visit our contact page to schedule a roof inspection. We will tell you honestly whether you need a repair, a replacement, or just a little patch. No pressure, no upselling, just honest work from people who have been doing this for a quarter century.

    Frequently Asked Questions

    Can a small roof leak really turn into a full replacement if I ignore it?

    Yes. We have watched a $400 flashing repair turn into an $8,000 replacement because the homeowner waited two extra rainy seasons. Water tracks along the decking and rafters long before it shows up as a ceiling stain, so by the time you see damage inside, the plywood underneath is often already soft. Our team recommends addressing any active leak within days, not months. Call us at (704) 266-0448 for a same-week inspection.

    Does a roof repair void my shingle manufacturer’s warranty?

    Not if it is done correctly. Manufacturer warranties like the ones detailed in CertainTeed’s documentation require repairs to use compatible materials and proper installation methods. We match shingle lines, nailing patterns, and flashing details so your existing warranty stays intact. If your roof needs a full tear-off instead, our roof replacement team registers new manufacturer warranties on your behalf.

    How many roof repairs is too many before I should just replace it?

    We use a simple rule with our Fort Mill and Charlotte clients: once you have paid for three separate repairs on the same roof within a five-year span, replacement almost always saves money long term. Repeated patching signals the roof system as a whole is failing, not just one section. We track repair history for repeat customers so we can tell you honestly when patching stops making financial sense.

    Can I get a second opinion before committing to a repair or replacement quote?

    Absolutely, and we encourage it. The National Roofing Contractors Association recommends homeowners collect three to four proposals before deciding, a standard we fully support. We provide a written inspection report with photos so you can compare our findings against any other contractor’s assessment. Visit our roofing services page to schedule a no-pressure inspection.

    What happens if my roof has both repairable areas and areas needing replacement?

    This is common on older Fort Mill and Rock Hill homes where one slope gets more sun exposure than another. In these cases we sometimes recommend a partial replacement of the worn slope while repairing isolated issues elsewhere, though we are careful to explain the tradeoffs since mismatched shingle age can complicate future work. We walk you through every scenario in writing before you decide.

    Is it cheaper to repair my roof myself before calling a professional?

    DIY repairs often cost more in the end. Improper nailing, missed flashing, or walking on brittle shingles can create new leak points that are harder to diagnose later. In our 25-plus years serving York County, we have re-done more DIY roof patches than we can count. A professional inspection typically costs less than the materials for a botched DIY fix, and it comes with an honest recommendation.

  • Deck Building Permits & Materials in Fort Mill, SC | Blue Rock

    Deck Building Permits & Materials in Fort Mill, SC | Blue Rock

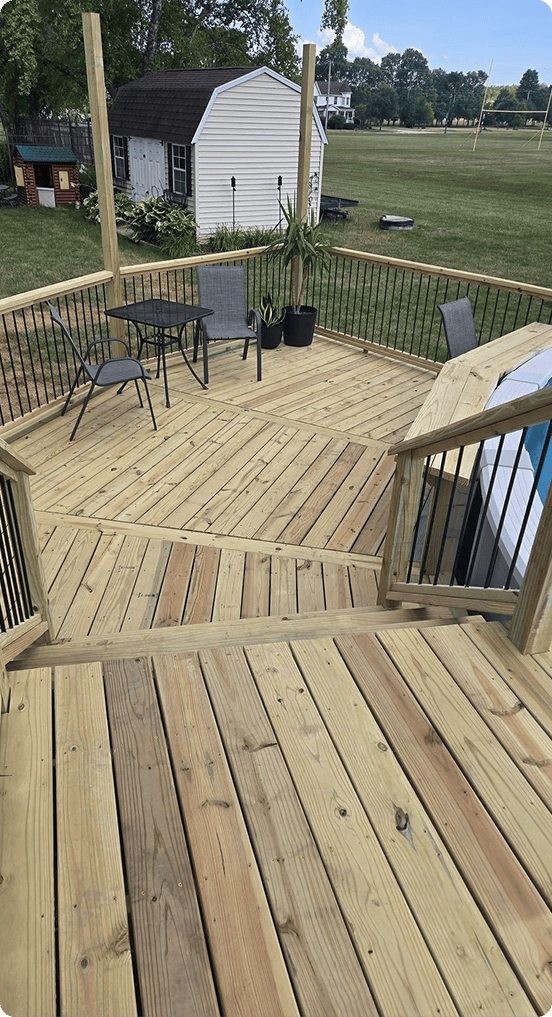
    A finished pressure-treated deck with black metal balusters built to code in Fort Mill, SC.

    Deck building Fort Mill SC projects require careful planning around permits, materials, and code requirements. A well-built deck adds living space, boosts home value, and gives you a place to enjoy those long Carolina evenings. But building a deck is also one of the most code-regulated projects on your property. Skip the permit, use the wrong fasteners, or frame the ledger wrong, and you are looking at a structure that can fail under load. Nick has been building custom decks across York County for over 25 years, and he has seen what happens when corners get cut.

    This guide walks through the permit process, material choices, and code requirements for building a deck in Fort Mill. Whether you are planning a small ground-level platform or a large multi-level deck with stairs and railing, the same rules apply. If you want professional help, our custom deck building services cover the full process from permit to finish.

    Do You Need a Permit to Build a Deck in Fort Mill?

    Yes. The Town of Fort Mill requires a residential building permit for any deck attached to a house or any deck more than 30 inches above grade. The building department reviews plans using the 2021 International Residential Code. You must submit a completed application, a plot plan showing setbacks, and construction documents before work begins.

    The Town of Fort Mill Building Department has a specific deck construction review checklist that outlines exactly what you need to submit. The plans cannot be processed without all items on the checklist. That includes a plot plan showing actual setbacks from property lines, footing details, framing plans, and guardrail specifications. If you are a homeowner acting as your own general contractor, you must file an Owner/Builder Disclosure with the York County Register of Deeds and live in the house for two years. The permit fee varies based on the project value. Inspections are required at the footing stage, framing stage, and final.

    What Materials Are Best for Deck Building in Fort Mill?

    The best deck materials for Fort Mill homes are pressure-treated southern yellow pine for framing and either pressure-treated wood, composite, or PVC for the decking surface. Pressure-treated lumber is the most affordable and widely used. Composite and PVC cost more but require less maintenance and last longer in our humid climate.

    We build most of our decks in Fort Mill with pressure-treated southern yellow pine for the structural frame. It is strong, readily available at local lumber yards, and holds up well in our climate when properly sealed. For the decking surface, we offer three main options. Pressure-treated wood is the budget choice. It needs sealing every 2 to 3 years. Composite decking like Trex or TimberTech costs more up front but never needs staining. PVC decking is the premium option, fully synthetic and resistant to moisture, mold, and fading. Here is how we break it down for homeowners:

    1. Pressure-treated wood: affordable, needs regular sealing.
    2. Composite: low maintenance, mid-range price.
    3. PVC: premium, fully synthetic, longest lifespan.

    In our experience, homeowners who plan to stay in their home for 10-plus years usually go with composite. It pays for itself in maintenance savings. If you are on a tighter budget or planning to sell in a few years, pressure-treated wood makes more sense.

    What Are the IRC Code Requirements for Decks?

    The International Residential Code requires guardrails on any deck surface more than 30 inches above grade. Guardrails must be at least 36 inches tall for residential decks. Baluster spacing cannot allow a 4-inch sphere to pass through. Deck stairs need handrails on one side if they have four or more risers. Footings must extend below frost depth.

    These are not suggestions. They are code requirements that the Fort Mill building inspector will check during your framing and final inspections. According to the North American Deck and Railing Association (NADRA), there are more than 60 million decks in the United States, and an estimated 30 million of them have exceeded their useful life. Many of those older decks were built before the IRC started requiring proper ledger connections in 2009. If you have an existing deck that was built before 2009, it is worth having it inspected. The framing may not meet current code, even if it still looks solid from the surface.

    How Do You Properly Attach a Deck Ledger Board?

    A ledger board must be attached to the house with lag screws or through-bolts, not nails. The IRC requires half-inch lag screws or bolts spaced according to the joist span. Flashing must be installed behind the ledger to prevent water from getting between the deck and the house. Nailed-only ledger connections are the leading cause of deck collapses.

    This is the most critical connection on any attached deck. NADRA reports that approximately 90 percent of all deck collapses result from ledger board connection failures, and most of those involve nailed-only connections. When we build a deck, we use half-inch through-bolts with washers on both sides. We install metal flashing behind the ledger, lapped over the top edge so water runs out and away from the house. We never nail a ledger. Nails can pull out under lateral load, especially after years of thermal cycling in the Carolina heat. If your existing deck has a nailed ledger, it needs to be retrofitted with bolts before you put weight on it again.

    What Size Footings Do Decks Need in Fort Mill?

    Deck footings in Fort Mill typically need to be 12 inches in diameter minimum and extend at least 12 inches below grade, or below the local frost line. York County falls in a marginal frost zone, so 12 to 18 inches is common. The footing must bear on undisturbed soil and support the calculated load for the deck size and occupancy.

    We pour concrete footings with Sonotube forms. The diameter depends on the deck size and the soil bearing capacity. For a standard residential deck, 12-inch footings on 8-foot centers work for most spans. For larger decks or decks with hot tubs, we step up to 16-inch footings and reduce the spacing. The building inspector will check the footing depth and diameter before you pour concrete, so do not skip that inspection. We have seen decks in Rock Hill where the footings were poured too shallow, and after one winter the posts started heaving. The deck became uneven, and the railing loosened. Fixing footings after the deck is built is expensive and frustrating.

    What Are the Top 5 Deck Building Mistakes to Avoid?

    The five most common deck building mistakes are using nails instead of bolts on the ledger, skipping the permit, undersizing footings, spacing balusters too wide, and failing to flash the ledger board. Each of these mistakes can cause inspection failures, premature rot, or structural failure. Here is the list we share with every client before we start a project.

    1. Nailing the ledger board instead of bolting it.
    2. Skipping the building permit and inspections.
    3. Pouring footings too shallow for the soil.
    4. Spacing balusters wider than 4 inches apart.
    5. Skip flashing behind the ledger board entirely.

    Every one of these mistakes is preventable. The permit process exists to catch them before the deck becomes a safety hazard. We have been building decks in Fort Mill for over 25 years, and we have never failed a framing or final inspection. That is because we follow the code on every connection, every spacing requirement, and every footing depth.

    What Makes Deck Building Fort Mill SC Projects Different?

    Deck building Fort Mill SC projects are governed by the Town of Fort Mill building department, which uses the 2021 International Residential Code. The local climate, soil conditions, and permit requirements all affect how a deck should be designed and built. Working with a contractor who knows the local process saves time and avoids inspection failures.

    How Long Does It Take to Build a Deck in Fort Mill?

    A standard residential deck in Fort Mill takes 5 to 10 days of construction time once the permit is approved. The permit review process typically takes 2 to 3 weeks. Weather delays are common in spring and summer due to afternoon thunderstorms. Total timeline from permit application to final inspection usually runs 4 to 6 weeks.

    We build decks in phases. First, we pull the permit and submit the plans. Once approved, we set footings and let the concrete cure for 48 hours. Then we frame the deck, install the ledger, joists, and beams. The framing inspection happens next. After it passes, we install the decking surface, railing, and stairs. The final inspection closes out the permit. If you also need staining or painting, we handle that separately. Our deck and fence painting service can stain or seal your new deck after installation.

    How Much Does a Deck Cost in Fort Mill, SC?

    A pressure-treated wood deck in Fort Mill typically costs $25 to $40 per square foot installed. Composite decks run $40 to $65 per square foot. PVC decks can reach $60 to $85 per square foot. A 200-square-foot pressure-treated deck usually totals $5,000 to $8,000. Material choice, deck height, railing style, and stair complexity all affect the final price.

    We are not the cheapest deck builder in York County. We know that. What we can promise is that your deck will pass every inspection, hold up to Carolina weather, and still look good in 10 years. We use the right fasteners, the right flashing, and the right framing for the load. If you are comparing estimates, ask each contractor whether they bolt the ledger, what size footings they pour, and whether they pull permits. The answers tell you everything you need to know about the quality of the build.

    Frequently Asked Questions About Deck Building in Fort Mill

    Can I build a deck without a permit in Fort Mill?

    No. The Town of Fort Mill requires a building permit for any deck attached to a house or any deck more than 30 inches above grade. Building without a permit can result in stop-work orders, fines, and difficulty selling your home later. The permit process also ensures your deck meets safety standards that protect your family and guests.

    How far apart should deck joists be spaced?

    Deck joists are typically spaced 16 inches on center for standard residential loads. If you are using composite decking or planning for heavy loads like a hot tub, joist spacing may need to be reduced to 12 inches on center. The joist size and span also depend on the decking material and the live load rating required by the IRC.

    What is the maximum baluster spacing on a deck?

    The IRC requires that no opening in a deck guardrail allows a 4-inch sphere to pass through. This means the space between balusters, between balusters and posts, and between the bottom rail and the deck surface must all be less than 4 inches. This rule exists to prevent small children from slipping through the railing.

    How deep do deck footings need to be in South Carolina?

    Deck footings in South Carolina typically need to extend at least 12 inches below grade to reach undisturbed soil and stay below the frost line. York County is in a marginal frost zone, so 12 to 18 inches is standard. Your local building inspector can confirm the exact depth required for your specific location and soil type.

    Can I use a deck permit from York County instead of Fort Mill?

    If you live inside the Town of Fort Mill limits, you need a permit from the Fort Mill Building Department, not York County. If you live in unincorporated York County, you would apply through York County. Check your address on the town boundary map to confirm which jurisdiction handles your permit before you submit plans.

    How often should I seal a pressure-treated deck?

    A pressure-treated wood deck should be sealed or stained every 2 to 3 years in the Fort Mill climate. Our summers bring high humidity and UV exposure that break down wood sealants faster than in drier climates. Composite and PVC decking do not require sealing, which is one reason many homeowners choose those materials despite the higher upfront cost.

    Does a deck add value to a home in Fort Mill?

    Yes, a well-built deck adds value to a Fort Mill home. A quality deck can return 60 to 75 percent of its cost in added home value, according to remodeling industry estimates. Decks are one of the few home improvements that add usable living space at a lower cost per square foot than a room addition.

    Ready to Build Your Fort Mill Deck?

    Building a deck in Fort Mill is a project that rewards doing it right the first time. The permit process catches mistakes before they become dangerous. The right materials hold up to Carolina weather for years. And proper construction techniques, from bolted ledgers to correctly spaced balusters, keep your family safe every time you walk outside.

    Nick and the team at Blue Rock Roofing and Construction have been building custom decks across Fort Mill, Rock Hill, Charlotte, and Gastonia for over 25 years. We are a family-owned business that handles the permit, the framing, the inspections, and the finish work. Call us at (704) 266-0448 or visit our contact page to schedule a consultation. We will walk your property, talk through your options, and give you an honest estimate for a deck built to last.

    Frequently Asked Questions

    What happens if I build a deck in Fort Mill without pulling a permit?

    Building without a required permit can lead to a stop-work order, fines from the Town of Fort Mill, and major complications when you sell your home. Unpermitted decks often fail home inspections and buyers can demand the structure be brought up to code or removed. Our team always pulls permits first so your deck is documented, inspected, and legally sound from day one. Call us at (704) 266-0448 before you break ground.

    Can I build my own deck if I am not a licensed contractor?

    Yes, but South Carolina and the Town of Fort Mill require homeowners acting as their own general contractor to file an Owner/Builder Disclosure with the York County Register of Deeds and live in the home for two years afterward. Many homeowners find it simpler to hire a licensed builder. Our custom deck building team handles the entire permit and construction process for you.

    How much weight can a properly built deck in Fort Mill hold?

    A residential deck built to the 2021 International Residential Code must support a live load of 40 pounds per square foot, plus dead load from the structure itself. According to the North American Deck and Railing Association, undersized framing is a leading cause of deck failure nationwide. We calculate load requirements before pouring footings so your deck safely handles exactly what you plan to put on it.

    Will a wood deck warp or twist in Fort Mill’s humidity?

    Pressure-treated southern yellow pine can warp or twist if it is not properly dried, spaced, and fastened during installation. Our crews use kiln-dried lumber where possible and follow correct fastening spacing to minimize movement as the wood acclimates to Carolina humidity swings. Composite and PVC decking, discussed on our deck building page, avoid this issue entirely since they do not absorb moisture.

    Can I add a roof or pergola over my new deck later?

    Yes, many Fort Mill homeowners add shade structures after living with a bare deck for a season. Adding a roof or pergola after the fact requires additional footings and structural support beyond what a basic deck frame provides, so we recommend telling your builder upfront if this is a future goal. Our covered porch and pergola installation team can design for this from the start or retrofit an existing deck.

    How do I maintain a new deck during its first year in Fort Mill?

    Inspect fasteners and railing connections after the first few months as lumber settles, and reseal pressure-treated wood once it has fully dried out, typically 60 to 90 days after installation. Sweep debris out of gaps between boards to prevent moisture retention, especially heading into our humid summer months. Composite and PVC decks need little more than periodic washing during this period.

  • Drywall Water Damage: First Steps for Homeowners | Blue Rock

    Drywall Water Damage: First Steps for Homeowners | Blue Rock

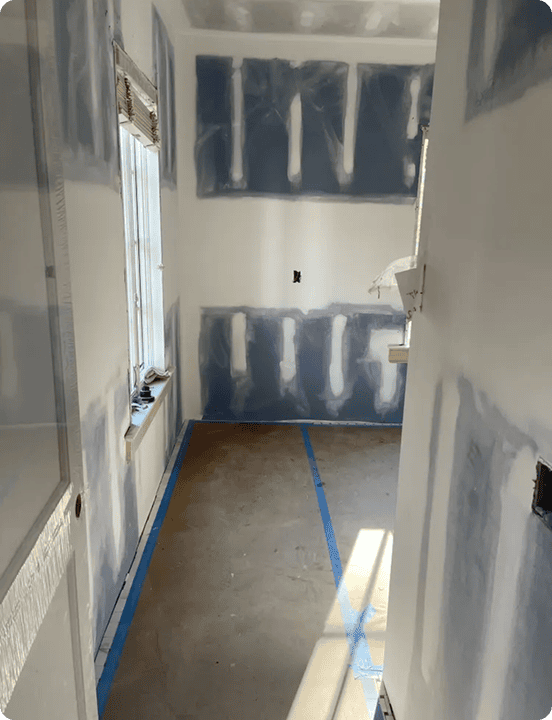
    Hallway prepped for drywall repair after a water leak. Acting fast limits the damage.

    Drywall water damage is one of the most common problems we fix in Fort Mill homes. A pipe bursts, a roof leaks, or a washing machine hose fails, and suddenly your ceiling or wall is soft, stained, and growing something you do not want growing. Nick has been doing drywall repair and installation across York County for over 25 years. He has seen what happens when homeowners wait, and he has seen what happens when they act fast. The difference is thousands of dollars and weeks of headaches.

    The good news is that most drywall water damage is fixable if you catch it early. The key is understanding what to do in the first 48 hours. That window matters more than anything else. If you need help with drywall repair after a leak, we can walk you through the process.

    What Causes Drywall Water Damage in Homes?

    Drywall water damage happens when moisture soaks into the gypsum core of the wallboard, weakening its structure and creating conditions for mold. Common causes include roof leaks, plumbing failures, appliance hose breaks, and condensation from poor ventilation. The damage ranges from surface stains to soft, crumbling sections that need full replacement.

    In our experience, the most common cause in Fort Mill homes is a roof leak that went unnoticed during a heavy thunderstorm. We get a lot of summer downpours here. A small roof leak can run down inside the wall cavity for weeks before the drywall shows a visible stain. By the time you see the bubble or the brown ring on your ceiling, the damage is already done. We have torn into walls in homes off Springfield Parkway and found black mold behind drywall that looked fine from the outside. That is why we always tell homeowners to check their attic after any major storm.

    How Quickly Does Mold Grow After Water Damage?

    Mold can begin growing on damp surfaces within 24 to 48 hours of water exposure. The U.S. Environmental Protection Agency recommends drying any wet surfaces completely within this window to prevent mold growth. If drywall stays wet longer than 48 hours, mold colonization becomes likely and replacement is often necessary.

    That 48-hour window is not a suggestion. It is the difference between drying out a wall with fans and cutting out a section of drywall, treating the studs behind it, and replacing the whole sheet. According to the EPA mold and moisture control guidelines, the most important step is to fix the source of the water problem and dry the area completely. If you do not fix the source, the damage comes back no matter how good the repair looks.

    What Are the First Steps When You Find Water Damage on Your Walls?

    Shut off the water source immediately, then remove furniture and belongings from the affected area. Next, ventilate the space by opening windows and running fans. If the drywall is bulging or soft, do not press on it. Document the damage with photos for insurance, then call a professional to assess whether the section can be dried and repaired or needs replacement.

    Here are the first 7 steps we recommend every homeowner take:

    1. Shut off the water source right away.
    2. Turn off electricity to the affected room.
    3. Move furniture and rugs out of the wet area.
    4. Open windows and set up fans.
    5. Photograph all damage for your insurance claim.
    6. Poke a small hole to drain trapped water.
    7. Call a drywall professional for an assessment.

    That sixth step is one most people skip. When water gets behind drywall, it pools in the wall cavity. A small drain hole near the bottom of the bulge lets that water out before it spreads further. Use a pencil or screwdriver. Keep the hole small. This is a temporary fix until a pro can get there.

    Can You Save Wet Drywall or Does It Need to Be Replaced?

    Whether drywall can be saved depends on how long it was wet and whether the paper backing has started to degrade. Drywall wet for less than 24 hours and dried thoroughly can often be saved. Drywall that stayed wet for over 48 hours, shows visible mold, or has lost structural integrity needs to be cut out and replaced.

    We get this question on almost every call. The honest answer is that you cannot always tell from the surface. We use a moisture meter to check the gypsum core and the studs behind it. If the reading is above 15 percent moisture content, the drywall is too far gone to save. We also check for mold. If mold has colonized the paper backing, the drywall has to come out. There is no shortcut here. Painting over water-stained drywall without drying it first just traps moisture inside and guarantees mold growth later. We have seen it happen in homes across Rock Hill and Gastonia.

    How Do You Dry Out Wet Drywall Properly?

    To dry wet drywall, create airflow on both sides of the wall if possible, use dehumidifiers to pull moisture from the air, and monitor moisture levels with a meter until readings drop below 15 percent. The process can take 2 to 5 days depending on humidity and the extent of saturation. Do not seal or paint the drywall until it is completely dry.

    Fort Mill summers make drying harder, not easier. Our humidity runs high from June through September. If you run fans without a dehumidifier, you are just moving wet air around. You need to pull the moisture out of the room, not blow it around. Here is what we tell homeowners: rent a commercial dehumidifier if you do not own one. Run it for at least 72 hours. Check the drywall with a moisture meter every 12 hours. If the reading stops dropping after 48 hours, the drywall is probably saturated through the core and needs replacement.

    What Are the Signs of Hidden Moisture Damage Behind Drywall?

    Hidden drywall water damage shows up as yellow or brown stains on walls and ceilings, a musty smell in enclosed rooms, paint that bubbles or peels, and drywall that feels soft or spongy when pressed. You might also notice baseboards pulling away from the wall or nails beginning to rust. Any of these signs means water got behind the surface.

    We did a job in a Fort Mill home off Doby Bridge Road where the homeowner noticed a faint yellow line where the ceiling met the wall. It looked like a shadow. We cut a small inspection hole and found that a slow roof leak had been running down inside the wall for months. The drywall was soft to the touch. The studs behind it had surface mold. That is a job that required removing the drywall section, treating the framing, and installing new board. If the homeowner had waited another month, the mold would have spread into the adjacent rooms.

    How Much Does It Cost to Fix Water-Damaged Drywall?

    Drywall water damage repair costs vary based on the extent of the damage and the size of the affected area. Small repairs where a section of drywall is cut out, replaced, and blended with texture typically run $300 to $800. Larger jobs involving multiple walls, mold remediation, or ceiling replacement can range from $1,500 to $4,000 or more. Every job is different.

    We are not the cheapest drywall contractor in York County, and we are upfront about that. What we promise is an honest assessment. We will tell you if a section can be dried and patched instead of replaced. We will not upsell you on full replacement if a repair will hold. Nick has been doing this work for over 25 years, and his texture matching is hard to beat. If you have an older home with knockdown texture, skip trowel, or orange peel, we can match it so the repair does not stand out like a sore thumb.

    When Should You Call a Professional for Wall Water Damage?

    Call a professional if the wet area is larger than a square foot, if the drywall is soft or crumbling, if you see or smell mold, or if the water damage involves a ceiling. Ceiling water damage is riskier than wall damage because saturated ceiling drywall can sag and eventually collapse. A professional can also check the framing and insulation behind the drywall for moisture and mold.

    If you are dealing with a new build or renovation and want to start with fresh drywall, our drywall installation services cover everything from single rooms to full homes. We handle the hanging, taping, mudding, and texture.

    Frequently Asked Questions About Drywall Water Damage

    How long does it take for wet drywall to dry out?

    Wet drywall typically takes 2 to 5 days to dry completely with proper airflow and dehumidification. The exact time depends on the humidity level in your home, the thickness of the drywall, and how much water it absorbed. Using a moisture meter is the only reliable way to confirm the drywall is fully dry before any repairs begin.

    Can I paint over water-stained drywall?

    You should not paint over water-stained drywall until it is completely dry and the source of the water is fixed. If you paint over a wet or damp stain, the moisture gets trapped and mold grows behind the paint. The stain will also bleed through most primers. Use a stain-blocking primer like Kilz or Zinsser BIN after the drywall is dry, then paint.

    Will insurance cover drywall water damage?

    It depends on your policy and the cause of the damage. Most homeowners insurance covers sudden and accidental water damage, like a burst pipe or a roof leak from a storm. It typically does not cover damage from gradual leaks or poor maintenance. Document the damage with photos and contact your insurance company as soon as possible to start the claim process.

    What does mold on drywall look like?

    Mold on drywall appears as black, green, or gray spots or patches on the surface. It can also show up as a fuzzy growth along the bottom of the wall where it meets the baseboard. If you see discoloration that spreads or returns after cleaning, you likely have mold inside the wall cavity. A professional can test and confirm the type of mold present.

    Can water-damaged drywall make you sick?

    Yes, water-damaged drywall can affect your health if mold has grown on it. Mold spores released into the air can cause respiratory irritation, allergic reactions, headaches, and worsen asthma symptoms. People with compromised immune systems, children, and the elderly are especially sensitive. If you smell a musty odor or see visible mold, have it inspected and removed promptly.

    Do I need to remove baseboards when drying wet drywall?

    Yes, removing baseboards is a good idea when drying wet drywall. Baseboards trap moisture against the bottom of the wall, which is where water tends to pool. Removing them lets air reach the lowest part of the drywall, where mold often starts. You can reinstall the baseboards once the wall is completely dry and repaired.

    How do you match drywall texture after a repair?

    Matching drywall texture requires experience and the right tools. We analyze the existing texture pattern, whether it is orange peel, knockdown, or skip trowel, and replicate it using the same spray technique and mud consistency. The repaired section is then blended into the surrounding wall so the patch is not visible after painting. It takes practice to get it right.

    What Should You Do Right Now?

    If you are dealing with drywall water damage, the clock is already running. Shut off the water source, document the damage, and get air moving across the wet area. Then call someone who can assess the drywall properly with a moisture meter and tell you whether it can be saved or needs to come out. Waiting is the most expensive thing you can do. Mold does not wait, and neither should you.

    Nick and the team at Blue Rock Roofing and Construction have been handling drywall repair and installation across Fort Mill, Rock Hill, Charlotte, and Gastonia for over 25 years. We are a family-owned business that treats every home like it is ours. Call us at (704) 266-0448 or visit our contact page to schedule an assessment. We will tell you honestly what needs fixing and what does not.

    Frequently Asked Questions

    What is the very first thing I should do if I find a wet ceiling right now?

    Shut off the water source if you can identify it, place a bucket or tarp to catch dripping water, and move electronics and furniture out of the area immediately. Do not turn on ceiling fixtures near the wet spot, since water and electricity are a serious hazard. Once the area is safe, call a professional. We answer emergency calls at (704) 266-0448 for exactly this situation.

    Can I run a box fan on a water-damaged wall myself before calling someone?

    Yes, running fans and opening windows immediately is a smart first step and can buy you time before a professional arrives. Just do not seal the wall, paint over it, or assume it is dry just because the surface feels cool. We recommend renting a dehumidifier alongside any fans, since fans alone just circulate humid air rather than actually removing moisture from it.

    How do I know if a water stain is old or from an active leak?

    Press gently on the stained area with a gloved hand or the back of a pencil. If it feels soft, spongy, or damp, the leak is likely active or recent. Old, dry stains typically feel hard and do not expand over time. When in doubt, our team uses a moisture meter during inspections to give you a definitive reading rather than a guess.

    Does drywall water damage always mean mold is present?

    Not necessarily. Mold requires sustained moisture, typically 24 to 48 hours per the EPA’s mold and moisture guidelines, so a leak caught and dried quickly may never develop mold. However, hidden leaks behind walls often go unnoticed well past that window. We check both the visible drywall and the framing behind it before telling a homeowner their walls are mold-free.

    Should I remove insulation behind water-damaged drywall?

    Yes, in most cases. Fiberglass and cellulose insulation hold moisture long after the drywall surface feels dry, which keeps studs damp and encourages mold growth from behind. When we open a wall for repair, we always check the insulation condition and replace it if it stayed wet more than a day or two. Skipping this step is a common reason water damage repairs fail.

    Can a small water stain be repaired without replacing the whole wall?

    Often, yes. If the drywall dried within 24 to 48 hours and shows no soft spots or mold, a stain-blocking primer and texture-matched patch can resolve a small area without full replacement. Our drywall services team assesses the extent of moisture penetration before recommending a spot repair versus a full section replacement, so you never pay for more work than you need.

  • Metal vs. Asphalt Shingles for Carolina Homes | Blue Rock

    Metal vs. Asphalt Shingles for Carolina Homes | Blue Rock

    A standing-seam metal roof on a Carolina home. Metal roofs last decades longer than asphalt but cost more up front.

    If you are building a home or replacing a roof in the Carolinas, you have probably weighed metal vs asphalt shingles. Both are popular choices, but they serve different budgets, timelines, and priorities. Nick has been installing both for over 25 years across Fort Mill, Charlotte, Rock Hill, and Gastonia. This post breaks down the real differences so you can choose the right material for your home and climate.

    We install both metal roofing and asphalt shingle roofing every month. There is no single right answer. The best choice depends on how long you plan to stay in the home, your budget, your roof pitch, and how much maintenance you want to deal with over the years. Let us look at how they compare.

    How Long Do Metal vs Asphalt Shingles Last?

    Metal roofs last 50 or more years, while asphalt shingles typically last 15 to 30 years depending on the quality and installation. A standing-seam metal roof can last even longer. The lifespan gap is the single biggest difference between the two materials and the main reason homeowners choose metal.

    According to the Metal Roofing Alliance, a properly installed metal roof lasts 50-plus years. That is two to three times longer than asphalt. The Metal Construction Association has found that coated standing-seam steel roofs can last up to 70 years. Compare that to asphalt. GAF notes that 3-tab shingles carry a 25-year warranty term. Architectural shingles come with a lifetime limited warranty for manufacturing defects. In practice, architectural shingles on Carolina homes last 20 to 30 years before replacement. Our Carolina sun and humidity wear shingles down faster than a drier climate would.

    What Does Each Material Cost?

    Metal roofing costs two to three times more than asphalt up front. A typical asphalt roof on a 2,000-square-foot Carolina home runs $6,000 to $12,000 installed. A standing-seam metal roof costs $15,000 to $30,000.

    We are straight with homeowners about this. If you plan to sell the home in five years, asphalt makes more financial sense. You will not recoup the metal roof premium in that timeframe. But if this is your forever home, metal pays for itself because you avoid one or two full roof replacements over the life of the material. The Metal Roofing Alliance reports that homeowners typically recoup 50 to 70 percent of their metal roof investment at resale, depending on location.

    Which Material Handles Carolina Storms Better?

    Metal roofs handle high winds, hail, and heavy rain better than asphalt shingles. Most metal roofing systems are rated for wind speeds up to 140 or 160 miles per hour. Asphalt shingles typically carry wind ratings of 60 to 130 miles per hour depending on the product and installation method.

    Carolina summers bring severe thunderstorms and the occasional hurricane remnant. We have torn off shingle roofs in Fort Mill and Charlotte that lost entire sections to a single storm. The wind gets under a loose shingle tab and rips a whole row off. Metal panels are interlocked and fastened to the deck with hidden clips, so they hold tight in wind that would strip shingles. Hail is another factor. Large hail can dent metal, but it typically does not compromise the waterproofing. Hail cracks asphalt shingles and tears granules off the surface, shortening the roof life. The Metal Roofing Alliance notes that metal roofs carry Class 4 hail protection ratings per UL 2218, which is the highest impact resistance rating available.

    How Do Metal and Asphalt Compare for Energy Efficiency?

    Metal roofs reflect solar heat and can reduce cooling costs by 10 to 40 percent in warm climates. Asphalt shingles absorb heat, which transfers into your attic and raises cooling loads during Carolina summers. The energy savings from metal are real but take years to offset the higher up-front cost.

    The Metal Roofing Alliance states that metal is one of the most energy-efficient roofing materials available and can save homeowners between 10 and 40 percent on energy costs. In Charlotte and Fort Mill, where summer temperatures regularly hit the 90s and air conditioning runs from May through September, that adds up. A reflective metal roof can keep your attic 20 to 30 degrees cooler than a dark asphalt roof. That means less strain on your HVAC system and lower utility bills. The savings are most noticeable on single-story homes with large roof areas and minimal attic insulation.

    What Are the Pros of Asphalt Shingles?

    Asphalt shingles are affordable, widely available, easy to repair, and come in dozens of colors and styles. The downside is a shorter lifespan and vulnerability to wind and hail damage.

    Here is a quick breakdown of asphalt shingle pros and cons:

    1. Lower up-front cost than metal.
    2. Available in many colors and styles.
    3. Easy to repair individual damaged shingles.
    4. Familiar to most roofing contractors.
    5. Shorter lifespan, 15 to 30 years.
    6. Vulnerable to wind lift and hail damage.
    7. Granule loss over time reduces protection.

    We install architectural shingles on most homes in the Carolinas. They are thicker than 3-tab shingles, have a dimensional look that most homeowners prefer, and carry longer warranties. GAF Timberline HDZ shingles, for example, are eligible for a 15-year wind warranty with no maximum wind speed limit when installed with the proper accessories. That is impressive for asphalt. But even the best architectural shingle will not match a metal roof for longevity or storm resistance.

    What Are the Pros of Metal Roofing?

    Metal roofing offers exceptional durability, energy efficiency, fire resistance, and a lifespan two to three times longer than asphalt. The drawbacks are higher cost and more complex installation.

    Here is the metal roofing pros and cons list:

    1. Lifespan of 50-plus years.
    2. High wind and hail resistance.
    3. Reflects heat, lowering cooling costs.
    4. Fire resistant with Class A rating.
    5. Higher up-front cost than asphalt.
    6. Installation requires specialized skills.
    7. Noise without proper decking and insulation.

    Standing-seam is the metal roof style we install most. The panels run vertically up the roof and connect with hidden fasteners, so there are no exposed screws to back out or leak over time. If you want to see examples or get a quote, check out our metal roof installation page. We also install corrugated and stamped metal panels for homeowners who want a different look at a lower price point than standing-seam.

    Which Roofing Material Is Best for Carolina Weather?

    Both materials work in the Carolina climate, but metal handles the heat, humidity, and storms better. Asphalt shingles are more susceptible to thermal cycling, which causes curling and cracking over time. Metal panels expand and contract but are designed for it, so they hold up longer in our temperature swings.

    In our experience, the biggest killer of asphalt roofs in the Carolinas is not wind or hail. It is heat. Our summers bake shingles day after day, and the UV exposure breaks down the asphalt over time. You see it as granule loss in your gutters. Once the granules are gone, the shingle dries out and cracks. Metal does not have this problem. It reflects heat instead of absorbing it, and the painted finishes on quality metal panels are engineered to resist fading and chalking for decades. If you live in a shaded area with mature trees, asphalt holds up better because it gets less direct sun. On exposed homes with southern exposure, metal is the smarter long-term play.

    Can You Install Metal Roofing Over Existing Shingles?

    Yes, in some cases you can install metal roofing over one existing layer of asphalt shingles. This saves on tear-off costs and disposal fees. However, the existing roof must be in decent condition, the decking must be sound, and local building codes must allow it. We inspect the existing roof before recommending this approach.

    We have done it both ways. Installing over existing shingles works when the old roof is flat and solid. But if there is any rot in the decking, you are covering up a problem that will get worse. We always inspect the attic from below to check for soft spots, water stains, and rot. If the decking is compromised, we tear off the old shingles first. It costs more, but you do not want to screw a 50-year metal roof to rotting wood. Customers tell us they appreciate that we check the deck before making a recommendation instead of just going for the cheaper option.

    Frequently Asked Questions About Metal vs Asphalt Shingles

    Is a metal roof louder than an asphalt roof in the rain?

    A metal roof is not significantly louder than asphalt when installed with solid decking and proper insulation. The old idea of metal roofs being noisy comes from barns and porches where metal was installed over open framing. On a residential home with plywood decking and attic insulation, the sound difference is minimal. Most homeowners cannot tell the difference from inside.

    Does a metal roof increase home value in the Carolinas?

    Yes. A metal roof can increase home value, especially in neighborhoods where buyers prioritize energy efficiency and durability. The Metal Roofing Alliance reports that homeowners recoup 50 to 70 percent of their investment at resale. In the Carolinas, where storm resistance matters to buyers, a metal roof can be a strong selling point.

    Can metal roofs rust in the Carolina humidity?

    Quality metal roofs do not rust in Carolina humidity. Modern metal roofing uses galvanized or Galvalume steel coated with aluminum and zinc, then painted with a baked-on finish. These coatings prevent corrosion even in our humid climate. We have installed metal roofs across Charlotte and Fort Mill that show zero rust after 15-plus years of exposure.

    How do I know if my roof can support a metal roof?

    Most residential roof structures can support a metal roof because metal is lighter than asphalt shingles. A metal roof weighs about 50 to 150 pounds per 100 square feet, while asphalt shingles weigh 200 to 400 pounds per square. If your roof currently holds asphalt shingles, it can handle metal. We verify the structure during inspection.

    Are asphalt shingles getting more expensive?

    Asphalt shingle prices have risen steadily over the past several years due to petroleum costs and supply chain factors. The price gap between budget architectural shingles and entry-level metal roofing has narrowed. That said, asphalt remains significantly cheaper than standing-seam metal for most homes.

    Which roofing material is best for a low-pitch roof?

    For low-pitch roofs, standing-seam metal is the better choice. Asphalt shingles require a minimum pitch of 2:12 with special underlayment. Standing-seam metal works on pitches as low as 1:12 because the panels shed water efficiently. If your roof has a low slope, talk to us about metal options.

    Do metal roofs require maintenance in the Carolinas?

    Metal roofs require very little maintenance. We recommend an annual visual inspection to check for loose fasteners, debris in valleys, and paint condition. Unlike asphalt, metal does not lose granules, curl, or crack. Occasional cleaning with a hose keeps the panels looking new. That low maintenance is a major selling point.

    Ready to Choose Your Roofing Material?

    Both metal and asphalt shingles have their place on Carolina homes. The right choice depends on your budget, your timeline, and what matters most to you. If you want the longest-lasting roof, metal wins. If you need an affordable roof that lasts 20-plus years, asphalt is practical.

    Call Blue Rock Roofing and Construction at (704) 266-0448 or visit our contact page. Nick and our crew will inspect your roof, talk through your options, and give you an honest recommendation. We install both materials and we will not push you toward one just because it costs more. Family-owned, 25-plus years of experience, and right here in the Carolinas.

    Frequently Asked Questions

    Which roofing material is better for a home near Lake Wylie or the Catawba River with lots of tree cover?

    Shaded homes near water often keep asphalt shingles in better condition longer because reduced direct sun slows UV breakdown. However, tree cover means more falling limbs and debris, which asphalt handles better in terms of repair cost. If your home has southern exposure with no shade, metal becomes the stronger choice. We assess sun exposure and tree proximity during every estimate. Call (704) 266-0448 to schedule yours.

    Can I mix metal and asphalt on the same roof, like metal over a porch and shingles on the main house?

    Yes, this is common in the Carolinas and something we install regularly. Metal accent roofs over porches, bay windows, or dormers pair well with asphalt shingles on the main roof planes, both for aesthetics and because porch roofs see more foot traffic and benefit from metal’s durability. We handle the transition flashing carefully since that junction is a common leak point if done wrong.

    Does switching to metal roofing lower my homeowners insurance premium?

    Many insurers offer discounts for metal roofing because of its Class 4 impact resistance and superior wind performance, though the discount amount varies by carrier and region. It is worth calling your insurance agent before your project to ask specifically about a metal roof credit. We provide documentation of the roofing system installed that you can submit to your insurer.

    How long does a metal roof installation take compared to asphalt in Fort Mill?

    Asphalt shingle installation typically takes one to two days for an average home, while a standing-seam metal roof usually takes three to five days due to the custom panel measurements and detail work at seams, valleys, and penetrations. Weather and roof complexity can extend either timeline. We give you a specific schedule after the initial inspection.

    Will hailstorms in the Charlotte area void a metal roof warranty?

    No, normal hail exposure does not void a metal roof warranty. Metal panels carry a Class 4 impact rating under UL 2218, the highest available, and the Metal Roofing Alliance confirms this rating reflects real-world hail performance rather than lab conditions alone. Cosmetic denting from severe hail is typically not covered, but the waterproofing performance remains intact and warrantied. Ask us about specific manufacturer terms during your consultation.

    Can I paint or repaint a metal roof to change its color later?

    Yes, metal roofs can be recoated after their factory finish begins to fade, typically after 20 or more years, using specialized elastomeric or acrylic roof coatings. This is far less disruptive than a full roof replacement. It is not a DIY project, though, since surface prep and coating compatibility matter for adhesion. Our metal roofing team can advise on recoating options as your roof ages.

  • How to Choose a Roofing Contractor in Fort Mill, SC | Blue Rock

    How to Choose a Roofing Contractor in Fort Mill, SC | Blue Rock

    Experienced roofers installing architectural shingles on a Fort Mill area home.

    Choosing a roofing contractor Fort Mill SC is a decision that affects your home for decades. A bad roof job leaks, fails early, and costs you thousands in repairs. A good one protects your family and your investment for 20 to 30 years. Nick has been installing and repairing roofs across York County for over 25 years, and he has seen every shortcut in the book. This post walks you through what to look for so you hire the right roofing contractor the first time.

    Fort Mill is growing fast, and that means new contractors show up every season. Some are great. Others disappear after one storm season. We want you to know how to tell the difference. Whether you need a full roofing services estimate or just an inspection, these guidelines apply.

    Why Is Choosing the Right Roofing Contractor Fort Mill SC So Important?

    The right roofing contractor delivers a roof that lasts its full expected lifespan with no leaks, no callbacks, and no surprises. The wrong one leaves you with shoddy workmanship, voided warranties, and water damage you discover months later when it rains. Your roof is too expensive to get wrong.

    According to GAF, one of the largest shingle manufacturers in North America, most architectural shingles come with a lifetime limited warranty for manufacturing defects. But here is the catch. That warranty only applies if the shingles are installed according to the manufacturer specifications. A contractor who cuts corners on underlayment, flashing, or nailing patterns can void that warranty without you knowing. You could have a 50-year shingle on your roof and zero warranty coverage because the installer did not follow the instructions.

    What Should You Look for in a Fort Mill Roofing Contractor?

    Look for a licensed, insured contractor with a physical local address, verifiable references, and experience with your specific roof type. Ask for proof of insurance, check online reviews across multiple platforms, and confirm they have been in business for at least three years. A contractor who cannot provide these basics is a risk.

    Here is our checklist of what to verify before you sign anything:

    1. Verify the contractor license or registration.
    2. Ask for proof of liability and workers comp insurance.
    3. Get a written estimate with material costs itemized.
    4. Check reviews on Google and the Better Business Bureau.
    5. Ask for three local references from recent jobs.
    6. Confirm a physical address, not just a PO box.
    7. Make sure they pull permits for the work.

    Does South Carolina Require Roofing Contractors to Be Licensed?

    Yes. South Carolina requires residential specialty contractor registration for roofing work exceeding $500. The South Carolina Department of Labor, Licensing and Regulation oversees this registration through the Residential Builders Commission. Roofers must have at least one year of residential experience to qualify, and the registration must be current.

    This is something we check on every job. In South Carolina, a residential specialty contractor who does roofing work over $500 without registration is operating illegally. The registration is not just a piece of paper. It means the contractor has submitted a work experience affidavit, paid the application fee, and is accountable to the state if something goes wrong. If a contractor cannot show you a current registration number, that is a red flag. You can verify any contractor registration through the LLR website.

    How Do You Verify Insurance Coverage?

    Ask the contractor for a certificate of insurance showing both general liability and workers compensation coverage. Call the insurance company listed on the certificate to confirm the policy is active. A verbal promise of insurance means nothing without the paperwork to back it up.

    We carry liability insurance and workers comp on every crew member. When a roofer gets hurt on your property and the contractor has no workers comp, the homeowner can be held liable. That is a nightmare scenario. We have seen it happen in York County. A homeowner hired an unlicensed handyman to patch a roof, the guy fell off the ladder, and the homeowner faced a lawsuit. Ask for the certificate. If they hesitate, find someone else.

    What Questions Should You Ask Before Hiring a Roofer?

    Ask about their experience with your roof material, their warranty on workmanship, their timeline, and who handles the permit. Get every answer in writing on the estimate. If a contractor dodges these questions, they are not the right fit for your project.

    These are the questions we recommend every Fort Mill homeowner ask:

    1. How long have you been roofing in York County?
    2. What warranty do you offer on workmanship?
    3. Who pulls the building permit?
    4. How many roofs like mine have you installed?
    5. What happens if there is hidden damage found?
    6. How do you handle payment schedule?

    Pay attention to how they answer. A good contractor gives direct answers without hedging. If they say things like “we will figure it out as we go” when you ask about permits or payment, walk away. The best Fort Mill roofing contractor for your project is one who has done similar work many times and can tell you exactly how the process works.

    How Much Should a New Roof Cost in Fort Mill, SC?

    A new asphalt shingle roof in Fort Mill typically costs between $5,000 and $12,000 depending on the size of the home, the pitch of the roof, and the shingle quality. Architectural shingles cost more than 3-tab but last longer. Metal roofs cost more up front but can last two to three times longer.

    Be wary of estimates that are dramatically lower than others. If three contractors quote between $7,000 and $9,000 and one comes in at $4,000, something is wrong. That contractor is either skipping steps, using cheap materials, or planning to add costs later. We give honest estimates based on real material costs and labor. We are not the cheapest roofer in Fort Mill, and we are honest about that. What we promise is that the price on the estimate is the price you pay. No surprise add-ons halfway through the job.

    What Are the Red Flags When Hiring a Roofing Contractor?

    Door-to-door storm chasers, demands for large upfront payments, no physical address, and pressure to sign on the spot are major red flags. Also avoid contractors who will not put anything in writing.

    After a big storm rolls through Fort Mill, out-of-town contractors flock to the area. Some are legitimate. Many are not. They knock on doors, point at supposed damage, and push you to sign a contract on the spot before you have time to think. We have spent 25 years building a reputation in the Carolinas. We do not chase storms. If you suspect storm damage, call us for a roof inspection and we will tell you honestly whether you need a repair or a replacement.

    Why Should You Hire a Local Fort Mill Roofing Contractor?

    A local contractor knows the York County building codes, understands the local weather patterns, and is around next year if you need a warranty repair. Out-of-town contractors often leave after the storm work dries up, leaving you with no one to call when a problem surfaces months later.

    We live and work here. Nick grew up in this area. We know that Fort Mill summers bring heavy thunderstorms and that winter ice dams are rare but not impossible. We know which neighborhoods have older homes with multiple layers of shingles that need a full tear-off. We know the York County permit process and which inspections are required. When you hire a roofing contractor Fort Mill SC residents trust, you want someone who will still be here when you need them.

    Frequently Asked Questions About Choosing a Roofing Contractor

    How do I check if a roofing contractor is licensed in South Carolina?

    You can verify a roofing contractor registration through the South Carolina LLR website. Search by name or registration number. The Residential Builders Commission oversees roofing registrations, and any contractor doing residential roofing work over $500 must have a current registration. Ask for the number and look it up yourself.

    Should I hire the cheapest roofing contractor?

    No. The cheapest estimate usually means corners are being cut somewhere, whether on materials, underlayment, flashing, or labor. A roof is a 20 to 30 year investment. Saving $1,000 now can cost you $5,000 in premature repairs later. Get three estimates, compare them line by line, and choose based on value and reputation, not just price.

    How long does a roof replacement take in Fort Mill?

    Most residential roof replacements in Fort Mill take one to two days for an average-sized home. Larger homes or homes with steep pitches may take three days. Weather can extend the timeline. A reputable contractor will give you a realistic schedule and communicate any delays as they happen.

    What warranty should a roofing contractor offer?

    A roofing contractor should offer a workmanship warranty of at least one year, though many offer two to five years. Manufacturer warranties on shingles are separate and cover material defects only. Ask for both warranties in writing and understand what each covers before signing the contract.

    Do I need to be home during the roof installation?

    No, you do not need to be home during installation, but you should be available by phone in case the crew finds unexpected damage or has a question. Keep pets and children inside or away from the work area. The noise is significant, so plan accordingly if you work from home.

    What happens if it rains during my roof replacement?

    A professional contractor monitors the weather and tarp’s the exposed roof at the end of each day. If rain starts unexpectedly during the tear-off, the crew covers the roof immediately. Water damage during a roof replacement is rare with a competent crew, but you should ask how the contractor handles weather delays.

    Can a roofing contractor help with insurance claims?

    Yes. An experienced roofing contractor can document storm damage with photos and notes that support your insurance claim. They cannot negotiate the claim for you, but they can provide the evidence your adjuster needs. We work with homeowners and insurance adjusters regularly to make sure legitimate damage is covered.

    Get a Free Roofing Estimate in Fort Mill Today

    If you need a new roof, a repair, or just an honest inspection, call Blue Rock Roofing and Construction. Nick and our crew have been working on Fort Mill roofs for over 25 years. We are family-owned, fully insured, and registered with the state of South Carolina. We give free estimates, pull permits, and stand behind our work.

    Call us at (704) 266-0448 or reach out through our contact page. We will come out, inspect your roof, and give you a straight answer about what you need. No pressure, no sales tactics, just honest work from a local crew that plans to be here for the long haul.

    Frequently Asked Questions

    How many roofing estimates should I actually get before choosing a contractor in Fort Mill?

    We recommend three estimates, which aligns with the National Roofing Contractors Association’s general guidance to compare multiple proposals before committing. Two estimates rarely give enough range to spot outliers, while more than four often becomes overwhelming to compare fairly. Line up the scope, materials, and warranty terms side by side, not just the bottom-line price, before deciding.

    What is the difference between a roofing contractor’s workmanship warranty and the manufacturer’s shingle warranty?

    The workmanship warranty covers installation errors like leaks from poor flashing or nailing, and it comes directly from the contractor, typically for one to five years. The manufacturer warranty, like those from GAF, covers material defects only and can last decades. You need both in writing, since a material defect claim will not help you if the actual problem was installation error.

    Should I be suspicious if a roofing contractor offers to waive my insurance deductible?

    Yes. Offering to waive or absorb your insurance deductible is illegal in South Carolina and a common tactic among storm-chasing contractors who inflate other costs to cover the difference. A legitimate local contractor works within your actual coverage and never suggests falsifying a claim. If you hear this offer, treat it as a serious red flag and look elsewhere.

    Does a roofing contractor need to be based in York County to do good work here?

    Not necessarily, but local presence matters more than people realize. A contractor based in York County understands Fort Mill’s permit process, typical soil and drainage issues, and storm patterns, and they are still reachable next year if a warranty issue comes up. We have served Fort Mill, Rock Hill, Charlotte, and Gastonia for over 25 years and are not going anywhere. Reach us anytime at (704) 266-0448.

    What should be included in a written roofing estimate?

    A complete estimate should itemize material brand and type, quantity, labor cost, permit fees, disposal fees, the payment schedule, and both warranty terms in writing. Vague estimates that just list a single lump sum make it hard to compare contractors or catch hidden costs later. We provide itemized estimates on every job so you know exactly what you are paying for.

    Can I ask a roofing contractor for proof of their South Carolina registration number before scheduling an estimate?

    Yes, and you should. Any legitimate residential specialty contractor doing roofing work over $500 must be registered with the South Carolina Department of Labor, Licensing and Regulation, and they should provide this number without hesitation. We share our registration details upfront, and you are always welcome to verify us independently before booking through our roofing services page.

  • How Often Should You Paint Your Home’s Exterior?

    How Often Should You Paint Your Home’s Exterior?

    Your home’s exterior paint is doing far more work than most homeowners realize. It is the first line of defense against Charlotte’s humid summers, Fort Mill’s heavy spring rains, and the freeze-thaw swings that hit the Carolinas every winter. Once that paint film starts to break down, moisture works its way into siding, trim, and structural wood, and a cosmetic issue turns into a repair bill.

    We’re Blue Rock Roofing & Construction, and we’ve spent more than 25 years painting, repairing, and protecting homes throughout Charlotte, Fort Mill, and the surrounding Carolinas. In that time, we’ve inspected thousands of exteriors, and one pattern is constant: the homeowners who repaint on a predictable schedule spend far less on repairs than the ones who wait until damage is visible from the street.

    This guide answers the question we hear most often from homeowners across Mecklenburg and York County: how often does a house really need to be repainted, and what actually determines that timeline? We’ll walk through material-specific lifespans, the local weather factors unique to our region, the warning signs that mean you’ve waited too long, and the maintenance habits that stretch a paint job’s life by years.


    How Often Should Exterior Paint Be Redone?

    Most home exteriors in the Charlotte and Fort Mill area need repainting every 5 to 10 years, depending on siding material, sun exposure, and paint quality. Wood siding typically needs attention every 5 to 7 years, while fiber cement and vinyl can often stretch past a decade. Humidity and UV exposure in the Carolinas tend to shorten these windows compared to drier climates.

    There is no single number that applies to every home, because paint failure is driven by a combination of material, application quality, and climate exposure. A brick home with painted trim in a shaded Fort Mill neighborhood will hold its finish far longer than a wood-sided farmhouse sitting in full sun on an open lot in Rock Hill.

    Typical Repaint Intervals by Siding Material

    1. Wood siding: 5 to 7 years. Wood expands and contracts with humidity, which stresses the paint film faster than other materials.
    2. Stucco: 5 to 10 years. Porous stucco absorbs moisture, and repeated wet-dry cycles cause the finish to chalk and fade.
    3. Fiber cement siding: 10 to 15 years. Factory-primed fiber cement holds paint longer than raw wood, but caulked joints still need periodic attention.
    4. Painted brick: 10 to 15 years. Brick itself doesn’t rot, but painted mortar joints and window trim will show wear first.
    5. Aluminum and vinyl siding: 10 years or more, when a flexible, vinyl-safe paint is used and applied correctly.

    Why Does Charlotte’s Climate Wear Out Exterior Paint Faster?

    Charlotte and Fort Mill homes face a combination of intense summer UV exposure, high humidity, and sudden severe storms that accelerate paint breakdown compared to drier or milder climates. This cycle of expansion, moisture saturation, and UV degradation causes fading, chalking, and cracking well before a paint manufacturer’s warranty period ends.

    The Carolinas sit in a humid subtropical zone, and that matters more for exterior paint than most homeowners expect. According to the National Weather Service, the greater Charlotte region regularly experiences summer heat indexes above 95°F combined with high dew points, and severe thunderstorm season runs from spring through early fall. That combination of heat, humidity, and wind-driven rain is exactly the environment that breaks down lower-quality paint films fastest.

    Local Weather Factors That Shorten Paint Life

    • Intense, direct UV exposure on south- and west-facing walls
    • High summer humidity that keeps moisture in siding longer after rain
    • Heavy spring and summer thunderstorms, including wind-driven rain
    • Occasional hail and high wind events that physically damage the paint film
    • Winter freeze-thaw cycles that stress caulking and joints

    Homes with full-day sun exposure, minimal tree cover, or south-facing elevations in Fort Mill, Waxhaw, and Indian Land tend to need repainting on the shorter end of these ranges. Shaded, tree-covered lots in older Charlotte neighborhoods often make it to the longer end.


    What Are the Warning Signs That Your Home Needs Repainting?

    The clearest signs your home needs repainting are fading color, peeling or cracking paint, chalky residue on your hand after touching the siding, and visible gaps in caulking around trim and windows. Any of these signs means the paint has stopped protecting the surface underneath, and moisture is likely already getting in.

    9 Signs It’s Time to Repaint Your Home’s Exterior

    1. Fading or uneven color — sun-bleached walls have lost UV protection.
    2. Peeling or flaking paint — moisture has already broken the bond between paint and surface.
    3. Cracked or “alligatored” paint — usually a sign of an aging paint film or poor original prep.
    4. Blistering or bubbling — trapped moisture pushing through the paint layer.
    5. Chalking or powdery residue — the paint’s binders are breaking down.
    6. Exposed bare wood or siding — the surface has no protective coating left at all.
    7. Mold or mildew growth — a sign of trapped moisture and reduced ventilation at the surface.
    8. Water stains or dark streaking — often points to a failing seal at trim or flashing.
    9. Cracked or missing caulk around windows and doors — an open path for water intrusion.

    Catching even one or two of these signs early is far less expensive than waiting until several appear at once. If you’re also noticing water stains near your roofline, it’s worth having both your roofing and paint checked in the same visit, since the two systems often fail for related reasons.


    What Happens If You Wait Too Long to Repaint?

    Waiting too long to repaint allows water to penetrate exposed wood, trim, and siding, which leads to rot, mold growth, and structural damage that costs significantly more to repair than a routine repaint. What starts as a cosmetic issue becomes a moisture-intrusion problem that can affect framing, insulation, and interior drywall.

    In our experience serving homeowners throughout Charlotte and the surrounding Carolinas for more than two decades, the most expensive calls we get are never about paint — they’re about the water damage that happened because paint failure went unaddressed for a year or two too long. A $4,000 to $8,000 repaint often prevents a $15,000+ siding and framing repair.

    Costs of Delaying Exterior Painting

    • Wood rot requiring board or trim replacement
    • Mold and mildew remediation, especially in shaded or humid areas
    • Siding replacement instead of simple repainting
    • Interior drywall damage if water tracks inward through trim or window openings
    • Reduced resale value and curb appeal

    Does Paint Quality Affect How Often You Need to Repaint?

    Yes — high-quality 100% acrylic exterior paint can last significantly longer than budget paint because it resists UV fading, retains flexibility through temperature swings, and adheres better to primed surfaces. Premium paint typically costs more upfront but stretches the repaint cycle by several years, lowering the long-term cost per year of protection.

    Lower-grade paints often use more filler and less resin, which means they chalk and fade faster under the intense UV load Charlotte-area homes receive for much of the year. Investing in a quality product is one of the few home maintenance decisions that pays for itself directly in fewer repaint cycles.


    Why Does Surface Preparation Matter More Than the Paint Itself?

    Surface preparation determines how long paint actually lasts, regardless of product quality, because paint applied over dirt, mildew, chalking residue, or loose material will fail early no matter how good it is. Proper washing, scraping, sanding, and priming create the bond that allows paint to reach its full expected lifespan.

    We’ve inspected countless homes where a premium paint failed in three years simply because it was applied over an unprepared surface. It’s the single biggest factor separating a paint job that lasts 10 years from one that needs redoing in three.

    Proper Exterior Paint Preparation Steps

    1. Pressure wash the entire exterior to remove dirt, pollen, and mildew
    2. Scrape all loose, cracked, or peeling paint
    3. Sand rough or uneven areas smooth
    4. Repair or replace any damaged wood, siding, or trim
    5. Re-caulk gaps around windows, doors, and trim joints
    6. Spot-prime bare wood, patched areas, and stains
    7. Apply two coats of high-quality exterior paint for full coverage and protection

    How Can Homeowners Extend the Life of Their Exterior Paint?

    Homeowners can extend exterior paint life by washing siding annually, trimming trees and shrubs away from exterior walls, keeping gutters clear to prevent overflow staining, and repairing small paint failures before they spread. These low-cost habits routinely add 2 to 5 years to a paint job’s usable life.

    Maintenance Habits That Protect Your Investment

    • Rinse exterior surfaces once a year to remove pollen, dirt, and mildew buildup
    • Inspect trim, corners, and window sills twice a year for early peeling
    • Keep gutters clean so overflow doesn’t streak or saturate siding
    • Trim vegetation back from siding to reduce trapped moisture and shade-driven mildew
    • Address small cracks or chips before the next humid season sets in

    According to guidance published by the U.S. Environmental Protection Agency, homes built before 1978 may contain lead-based paint, and any scraping or surface disturbance on these older homes should follow EPA-certified lead-safe work practices (EPA Lead-Safe Guidelines). This is a critical safety consideration for many of the older homes we work on throughout historic Charlotte neighborhoods.


    Is It Better to Hire a Professional Painter or Paint the Exterior Yourself?

    Professional exterior painting typically delivers a longer-lasting result than DIY painting because contractors bring proper surface preparation equipment, commercial-grade materials, and the experience to identify hidden wood damage before it’s sealed under new paint. For most two-story homes and older properties, professional application also avoids serious fall-risk safety issues.

    DIY exterior painting can work for small, single-story homes with straightforward siding, but most homeowners underestimate how much preparation time a quality job actually requires. Skipping steps to save time is the most common reason a fresh paint job fails within a year or two.


    Frequently Asked Questions

    How do I know if my house needs to be repainted this year?

    Look for fading, peeling, cracking, or chalky residue on your siding, along with gaps in caulking around windows and trim. If your paint is more than 7 to 10 years old and showing any of these signs, it’s a strong indicator that a fresh coat is needed before moisture reaches the surface underneath.

    What time of year is best to paint a home’s exterior in the Charlotte area?

    Spring and fall are generally the best seasons to paint exteriors in the Charlotte and Fort Mill area, since temperatures are moderate and humidity is lower than peak summer. Painting in extreme heat or high humidity can cause paint to dry too quickly or trap moisture, shortening the finish’s lifespan.

    Can I paint over old peeling paint instead of scraping it?

    No — painting over peeling or flaking paint without scraping and prepping the surface almost always leads to early failure. The new paint bonds to the old failing layer instead of the actual siding, so it peels again within a year or two, wasting both the material and labor cost.

    How much does exterior painting typically cost in the Charlotte and Fort Mill area?

    Exterior painting costs vary based on square footage, siding material, and the amount of repair work needed, but most Charlotte-area homes fall into a range determined during a free on-site estimate. Homes needing significant surface repair or wood replacement will cost more than homes in good structural condition.

    Does the color of paint affect how often I need to repaint?

    Yes — darker colors absorb more UV radiation and heat, which can accelerate fading and cracking compared to lighter shades. Homes painted in deep colors on full-sun elevations in the Carolinas may need touch-ups or repainting slightly sooner than lighter-colored homes in similar conditions.

    Should I repaint my house before selling it?

    A fresh, well-prepared exterior paint job is one of the highest-return improvements before listing a home, since it directly affects curb appeal and buyer perception of overall maintenance. If your current paint shows fading, peeling, or chalking, addressing it before listing typically pays for itself in sale price and days on market.

    Can storm damage affect how long my paint lasts?

    Yes — hail, wind-driven debris, and heavy rain can chip, crack, or strip paint in localized areas, and repeated storm exposure shortens the overall lifespan of an exterior finish. If your home has experienced recent severe weather, it’s worth having both your paint and your roof inspected together.


    Schedule Your Free Exterior Painting Estimate in Charlotte or Fort Mill

    At Blue Rock Roofing & Construction, we’ve protected homes throughout the Carolinas for more than 25 years, and exterior painting is one of the most effective ways to prevent costly repairs down the road. From thorough surface preparation to the final coat, our team handles every step with the same standard of workmanship we bring to our roofing and roof repair projects.

    We proudly serve homeowners throughout Fort Mill, Charlotte, Rock Hill, Lake Wylie, Gastonia, Waxhaw, Clover, Lancaster, Pineville, Weddington, and surrounding Mecklenburg and York County communities. Whether your home needs a refresh or a complete exterior transformation, we’re ready to help — and if we spot early warning signs on your roof, gutters, or siding while we’re there, we’ll tell you honestly rather than just quoting the paint job.

    Call (704) 266-0448 today or contact us online to schedule your free exterior painting estimate.

  • How Storm Damage Can Affect Your Roof and What to Do Next

    How Storm Damage Can Affect Your Roof and What to Do Next

    Severe weather is a routine part of homeownership in Charlotte, Fort Mill, and the surrounding Carolinas. High winds, hail, torrential downpours, and falling tree limbs move through our region multiple times a year, and every one of these events has the potential to compromise a roofing system — sometimes obviously, sometimes in ways you can’t see from the ground.

    We’re Blue Rock Roofing & Construction, and for more than 25 years we’ve inspected roofs across Mecklenburg and York County in the days and weeks after major storms. What we see consistently is that the homes with the worst long-term damage are rarely the ones with the most dramatic-looking storms — they’re the ones where a homeowner assumed “it looks fine” and skipped the inspection.

    This guide covers exactly how different types of severe weather damage a roof, the warning signs to check for after a storm passes, how the insurance claims process works, and why prompt action protects both your home and your wallet.


    How Does a Storm Actually Damage a Roof?

    Storms damage roofs through four main mechanisms: high winds that lift and tear shingles, hail that bruises or cracks roofing materials, heavy rain that exposes existing weak points, and falling debris that punctures or dents the roof surface. Each mechanism creates a different type of damage, and some — like hail bruising — are invisible from the ground.

    According to the NOAA National Centers for Environmental Information Storm Events Database, North Carolina and South Carolina regularly log dozens of severe hail, high-wind, and tornado reports every year, with the spring and summer severe weather season producing the highest volume of roof-damaging events in our region. That frequency is exactly why we recommend a post-storm inspection as a standard precaution, not an overreaction.

    Common Storm-Related Causes of Roof Damage

    • High winds that lift, tear, or remove shingles
    • Hailstones that bruise, crack, or dent roofing materials
    • Heavy, wind-driven rainfall that finds existing weak points
    • Falling tree branches and airborne debris
    • Lightning strikes that damage roofing components or vents

    Can High Winds Really Lift Shingles Off a Roof?

    Yes — sustained winds above roughly 45 to 50 mph can lift, curl, or completely tear away asphalt shingles, especially on roofs with existing wear or aging adhesive seals. Once shingles are missing, the underlayment and roof deck beneath are directly exposed to moisture, dramatically increasing the risk of leaks with the next rainfall.

    Wind damage often looks worse in some spots than others because wind speed and uplift force vary across a roof’s slopes and edges. Corners, ridgelines, and eaves typically take the brunt of the damage first.

    Signs of Wind Damage After a Storm

    1. Missing shingles — the most visible and urgent sign of wind damage.
    2. Lifted or curled shingle edges — a sign the seal has broken even if the shingle is still attached.
    3. Loose or bent flashing — often found around chimneys, vents, and roof valleys.
    4. Roofing debris in the yard — granules, shingle fragments, or pieces of flashing on the ground.
    5. Visible gaps or uneven roof lines — best spotted from across the street, not from a ladder.

    Does Hail Always Cause Visible Damage to a Roof?

    No — hail frequently causes damage that is invisible from the ground, including bruised shingle mats, cracked seals, and granule loss that weakens a roof without creating an obvious hole or leak. This hidden damage can significantly shorten a roof’s remaining lifespan even when there’s no active leak yet.

    This is one of the most important things we explain to homeowners after a hailstorm: a roof can look completely normal from the driveway and still have sustained damage that will cause problems within a year or two. Bruised shingles lose their granule protection and become far more vulnerable to UV degradation and future leaks.

    Signs of Hidden Hail Damage

    • Bruised or soft spots on shingles (often only detectable by touch)
    • Cracked shingle surfaces
    • Noticeable granule loss, especially collecting in gutters
    • Dented flashing, vents, or gutter components
    • Impact marks or dimpling on metal roofing panels

    Why Does Heavy Rain Cause Leaks That Weren’t There Before?

    Heavy rain doesn’t usually damage a healthy roof on its own — instead, it exposes weaknesses that were already present, such as worn flashing, aging sealants, or shingles loosened by a previous storm. Wind-driven rain in particular can push water sideways and upward under shingles that would otherwise shed water fine in a normal downpour.

    If you notice water stains on your ceiling or walls after a heavy rain event, that’s rarely a coincidence — it usually means an existing vulnerability finally let enough water through to become visible indoors.

    Common Entry Points for Rainwater

    • Damaged or improperly sealed flashing around chimneys and vents
    • Missing or lifted shingles from a prior wind event
    • Worn or cracked sealant around roof penetrations
    • Aging roofing materials that have lost their water-shedding capability
    • Clogged or damaged gutters causing water to back up under the roofline

    If you’re seeing recurring water intrusion, it’s worth having both your roof and your gutters inspected together, since a backed-up gutter system frequently makes roof leaks worse than they would otherwise be.


    What Should You Check on Your Roof After a Storm?

    After a storm, check for missing or lifted shingles, bent or detached gutters, visible debris on the roof, water stains on ceilings or in the attic, sagging roof sections, and granules collecting in your gutters. Perform this check from the ground with binoculars — never climb onto a roof after a storm to inspect it yourself.

    Post-Storm Roof Inspection Checklist

    1. Walk the perimeter of your home and look for shingle fragments or granules on the ground
    2. Check gutters and downspouts for bending, detachment, or excess granule buildup
    3. Look up at the roofline from multiple angles for missing or lifted shingles
    4. Check the attic for daylight, damp insulation, or water stains on the underside of the roof deck
    5. Inspect ceilings and upper walls inside your home for new discoloration or staining
    6. Note any fallen branches or debris resting on the roof
    7. Schedule a professional inspection if you notice any of the above

    If you spot any of these warning signs, the safest next step is contacting a licensed roofing professional rather than climbing up yourself — ladder falls are one of the most common home-improvement injuries, and it only takes one wrong step to make the situation worse.


    Why Does It Matter If You Delay Roof Repairs After a Storm?

    Delaying roof repairs after storm damage allows moisture to keep entering with every subsequent rainfall, which compounds into wood rot, mold growth, insulation damage, and higher repair costs the longer it’s left unaddressed. What might have been a $500 repair immediately after the storm can become a multi-thousand-dollar interior repair within a single rainy season.

    In our experience handling storm damage calls throughout Charlotte and Fort Mill, the roofs that end up needing full roof replacement instead of a simple roof repair are almost always the ones where damage sat unaddressed through two or three additional storm cycles.

    What Prompt Storm Damage Repairs Help Prevent

    • Interior water damage to ceilings, walls, and flooring
    • Mold and mildew growth in attics and wall cavities
    • Rotted roof decking and structural framing
    • Soaked or compressed insulation that loses its R-value
    • Higher overall repair or replacement costs

    Will My Homeowner’s Insurance Cover Storm Damage to My Roof?

    Most homeowner’s insurance policies cover sudden storm damage from wind, hail, and falling debris, but coverage details depend on your specific policy, deductible, and the documented cause of damage. Getting a professional inspection and detailed documentation before filing a claim significantly improves the accuracy and outcome of the claims process.

    Insurance adjusters are trained to evaluate storm claims, but they aren’t roofing specialists, and claims that lack clear documentation of storm-specific damage are far more likely to be underpaid or partially denied.

    How a Professional Roof Inspection Supports an Insurance Claim

    1. Identifies and photographs storm-specific damage versus pre-existing wear
    2. Documents the extent and location of affected areas on the roof
    3. Provides a written assessment an adjuster can reference
    4. Explains repair versus replacement recommendations in plain language
    5. Gives homeowners an independent point of reference before speaking with their insurance provider

    We recommend scheduling this inspection before you file a claim whenever possible, so you walk into the conversation with your insurer already knowing what’s actually wrong with your roof.


    How Often Should You Have Your Roof Inspected in a Storm-Prone Area?

    Homeowners in storm-prone areas like Charlotte and Fort Mill should have their roof professionally inspected at least once a year, plus an additional inspection after any major wind, hail, or severe thunderstorm event. Regular inspections catch developing issues before they become emergency repairs, especially in a region that sees frequent severe weather.

    The National Weather Service maintains a regional severe weather climatology showing that the Carolinas experience elevated severe thunderstorm activity from spring through early fall (National Weather Service), which is why an annual inspection schedule paired with post-storm checks is the standard we recommend to every homeowner we work with.


    Frequently Asked Questions

    How soon after a storm should I have my roof inspected?

    You should schedule a roof inspection within a few days of any storm involving high winds, hail, or falling debris, even if you don’t see obvious damage from the ground. Hidden issues like hail bruising or lifted shingle seals often don’t produce a visible leak until weeks later, so early inspection catches problems while they’re still inexpensive to fix.

    Is it safe to inspect my own roof after a storm?

    No — climbing onto a roof after a storm is not recommended, since wet or debris-covered surfaces are especially prone to slips, and storm-weakened roof decking may not safely support weight. A ground-level visual check with binoculars is safe; anything beyond that should be left to a licensed roofing professional.

    What does hail damage actually look like on shingles?

    Hail damage on asphalt shingles typically appears as small, dark, bruised spots where granules have been knocked loose, along with cracked or dented shingle surfaces in more severe cases. These bruises can be difficult to see from the ground and are usually confirmed during a close-up professional inspection.

    Will filing an insurance claim for roof storm damage raise my premium?

    It’s possible, but a single storm-related claim is typically treated differently than a claim from neglect, since storm damage is generally considered a covered peril rather than a preventable event. Your insurance agent can explain how a specific claim might affect your policy before you decide whether to file.

    How long does a storm damage roof repair usually take?

    Most localized storm damage repairs, such as replacing missing shingles or resealing flashing, can be completed in a single day once materials are on hand. Larger-scale damage affecting multiple roof sections may take several days, and full roof replacements typically take one to three days depending on roof size and complexity.

    Can storm damage affect my roof even if I don’t see any leaks yet?

    Yes — many types of storm damage, especially hail bruising and lifted shingle seals, weaken a roof’s protective capability well before a visible leak develops. Left unaddressed, this hidden damage typically progresses into an active leak over subsequent rain events rather than resolving on its own.

    What’s the difference between storm damage repair and full roof replacement?

    Storm damage repair addresses specific, localized issues like missing shingles or damaged flashing, while full roof replacement is recommended when damage is widespread, the roof is already near the end of its expected lifespan, or repeated repairs have become more costly than replacement. A professional inspection is the best way to determine which option fits your situation.


    Schedule Your Free Storm Damage Roof Inspection in Charlotte or Fort Mill

    At Blue Rock Roofing & Construction, we understand how stressful storm damage can be, which is why we’ve built our reputation over more than 25 years on honest inspections, clear documentation, and dependable repairs — not high-pressure sales tactics. Whether your roof needs a targeted repair or a full roof replacement, our team will walk you through exactly what we find.

    We proudly serve homeowners throughout Fort Mill, Charlotte, Rock Hill, Lake Wylie, Gastonia, Waxhaw, Clover, Lancaster, Pineville, Weddington, and surrounding Mecklenburg and York County communities. If your home has recently experienced severe weather, don’t wait for a small issue to become a costly one. We also handle related storm impacts to gutters and exterior siding and trim, so we can assess your whole exterior in one visit.

    Call (704) 266-0448 today or contact us online to schedule your free storm damage roof inspection and estimate.

  • 7 Signs It’s Time to Replace Your Roof Before Major Damage Occurs

    7 Signs It’s Time to Replace Your Roof Before Major Damage Occurs

    Your roof works around the clock, protecting your home from rain, wind, heat, and the wide temperature swings that define a Carolinas year. Even the best roofing materials eventually wear out, and the real challenge for most homeowners isn’t knowing that a roof will eventually fail — it’s recognizing the warning signs early enough to replace it before that failure causes expensive interior damage.

    We’re Blue Rock Roofing & Construction, and for more than 25 years we’ve inspected roofs throughout Charlotte, Fort Mill, and the surrounding Carolinas. We’ve seen firsthand how a $12,000 roof replacement handled proactively can prevent a $30,000+ repair bill involving water damage, mold remediation, and structural framing repair. Waiting for a roof to fail completely is almost always the most expensive path.

    Below are the seven warning signs we look for most often, along with what they typically mean, how insurance and inspections factor in, and why early replacement protects both your home and your budget.


    How Do You Know When It’s Time to Replace Your Roof?

    You know it’s time to replace your roof when you notice multiple warning signs together — an aging roof (20+ years), curling or missing shingles, interior water stains, storm damage, granule loss, frequent repairs, or visible sagging. Any single sign warrants an inspection, but two or more together usually mean replacement is more cost-effective than continued repair.

    7 Signs It’s Time to Replace Your Roof

    1. Your roof is more than 20 years old.
    2. Shingles are curling, cracking, or missing.
    3. You notice water stains inside your home.
    4. Your roof has experienced significant storm damage.
    5. Granules are collecting in your gutters.
    6. Your roof requires frequent repairs.
    7. Your roof is beginning to sag.

    We’ll walk through each of these in detail below, since understanding why each sign matters helps you make a more confident decision about repair versus full roof replacement.


    1. Is a 20-Year-Old Roof Too Old to Trust?

    A roof older than 20 years is approaching or past the end of its expected service life for most standard asphalt shingle systems, even if it looks structurally fine from the ground. According to the National Roofing Contractors Association (NRCA), most new roofs are designed to provide useful service for about 20 years, with actual lifespan varying based on climate, material quality, and maintenance history.

    An aging roof can look deceptively fine while hidden deterioration — brittle underlayment, deteriorating seals, and thinning granule protection — is already underway beneath the surface. If your roof is approaching that 20-year mark, a professional inspection is worth scheduling even without visible leaks.


    2. What Do Curling, Cracking, or Missing Shingles Mean?

    Curling, cracking, or missing shingles mean your roof’s primary weather barrier is failing and can no longer reliably keep moisture out of your home. Once shingles lose their seal or go missing entirely, the underlayment and roof deck beneath are directly exposed, and it’s a matter of time before a leak develops.

    Signs Your Shingles Are Failing

    • Curled edges on multiple shingles across the roof
    • Visible cracking across the shingle surface
    • Missing shingles, especially after a windy day or storm
    • Loose roofing material that shifts or lifts in wind
    • An uneven, patchy appearance across the roof plane

    These issues typically indicate the roofing system as a whole is beginning to fail, not just an isolated shingle or two — which is an important distinction when deciding between a targeted roof repair and full replacement.


    3. What Do Water Stains on Ceilings Really Indicate?

    Water stains on ceilings or walls almost always indicate that moisture is actively entering through your roof, even if the stain itself looks small or hasn’t changed size recently. Left untreated, that moisture can damage insulation, drywall, structural framing, flooring, and in some cases electrical systems.

    Even a coin-sized water stain deserves attention. In our experience, homeowners often wait to see if a stain “gets worse” before calling anyone — but by the time it visibly worsens, the moisture has usually already been active behind the surface for weeks or months.


    4. Does Storm Damage Always Mean You Need a New Roof?

    Not always, but significant storm damage — including widespread missing shingles, structural sagging, or repeated storm impacts on an already-aging roof — often tips the balance toward replacement rather than repair. North and South Carolina experience frequent severe storms throughout the year, and repeated exposure compounds wear even when individual storms don’t cause catastrophic damage.

    According to NOAA’s National Centers for Environmental Information Storm Events Database, the Carolinas log frequent hail, high-wind, and severe thunderstorm reports every year (NOAA Storm Events Database), which means most roofs in our region absorb storm stress on a near-annual basis, not as a rare event.

    Storm Damage Warning Signs to Watch For

    • Missing or lifted shingles after high winds
    • Dented flashing, vents, or gutter components
    • Fallen branches or debris that struck the roof
    • New or worsening roof leaks following a storm
    • Excess granules collecting in gutters after hail

    If your roof has taken repeated storm hits over several years, that cumulative damage is a strong argument for replacement even if no single storm caused an obvious failure. Learn more about how storm damage affects roofing systems and what to check after severe weather.


    5. Why Does Granule Loss in Gutters Matter?

    Granule loss in your gutters matters because those granules are your shingles’ protective layer against UV rays and weather — once they’re gone, shingles deteriorate significantly faster. Finding excessive granules in gutters or around downspouts is one of the clearest signs that your shingles are nearing the end of their functional life.

    Some granule loss is normal, especially on a newer roof shedding manufacturing excess. But a steady, ongoing accumulation over time signals that the protective coating is wearing away and the shingles beneath are becoming increasingly vulnerable to cracking and sun damage.


    6. When Do Frequent Roof Repairs Cost More Than Replacement?

    Frequent roof repairs typically cost more than replacement once you’re calling a contractor annually for new leaks or shingle damage, because the cumulative repair cost over just a few years often exceeds the cost of one comprehensive roof replacement. At that point, you’re also still carrying the risk of an aging roof rather than starting fresh with a warrantied system.

    Signs Repairs Have Become More Costly Than Replacement

    1. You’ve called a roofer two or more times in the past 12 months for separate issues
    2. Each repair addresses a different section of the roof rather than the same recurring spot
    3. Your roof is already past 15 to 20 years old
    4. Repairs are becoming more frequent as time passes, not less
    5. A recent inspection noted multiple areas of concern, not just one

    A professional inspection can help determine objectively which option — continued repair or full replacement — offers the better long-term value for your specific roof and budget.


    7. What Does a Sagging Roof Mean for My Home’s Structure?

    A sagging roof means there is likely structural damage to the roof decking or framing, most often caused by prolonged water intrusion, rot, or long-term deterioration of the wood beneath the roofing material. This is one of the most serious warning signs a homeowner can encounter, and it should never be left unaddressed.

    If any section of your roofline appears uneven, dipped, or wavy when viewed from the street, that’s not a cosmetic issue — it’s a structural one. Contact a qualified roofing contractor immediately rather than waiting for a routine inspection window.


    Why Does Replacing a Roof Early Save Money Compared to Waiting?

    Replacing a roof before major failure saves money because it avoids the compounding costs of interior water damage, mold remediation, drywall replacement, structural framing repair, and insulation replacement that typically follow a full roof failure. Many homeowners delay replacement to avoid the upfront cost, only to face a significantly larger bill once hidden damage spreads.

    Costs Early Roof Replacement Helps You Avoid

    • Interior water damage to ceilings, walls, and flooring
    • Mold remediation in attics and wall cavities
    • Drywall replacement from water-damaged ceilings or walls
    • Structural framing repairs from prolonged moisture exposure
    • Insulation replacement after water saturation
    • Emergency roofing costs from after-hours or storm-related failures

    A proactive approach to roof replacement consistently protects both your home’s structure and your household budget more effectively than a reactive, wait-until-it-fails approach.


    What Does a Professional Roof Inspection Actually Check?

    A professional roof inspection evaluates roofing materials, flashing, roof decking, ventilation, drainage, signs of moisture intrusion, storm damage, and the roof’s overall remaining lifespan. This comprehensive review gives homeowners the specific information needed to decide between repair and replacement, rather than guessing based on a single visible issue.

    What a Qualified Roofing Contractor Evaluates

    1. Condition and age of existing roofing materials
    2. Flashing around chimneys, vents, and roof valleys
    3. Structural integrity of the roof decking
    4. Attic ventilation and moisture levels
    5. Gutter and drainage performance
    6. Signs of active or past moisture intrusion
    7. Evidence of storm-related damage
    8. Overall estimated remaining roof lifespan

    Not every aging roof needs immediate replacement — a thorough inspection is what turns a guess into an informed, confident decision.


    Frequently Asked Questions

    How long does a typical asphalt shingle roof last in the Carolinas?

    Most asphalt shingle roofs in the Charlotte and Fort Mill area last 20 to 25 years, though this range depends on shingle quality, ventilation, and how much storm exposure the roof has absorbed. Homes with poor attic ventilation or repeated severe weather exposure often see a shorter functional lifespan than this average.

    Can I replace just part of my roof instead of the whole thing?

    Partial roof replacement is sometimes possible if damage is isolated to one section and the rest of the roof is in good condition and a similar age. However, mismatched shingle batches, uneven aging, and inconsistent warranty coverage make a full replacement the better long-term option in most cases.

    How much does a full roof replacement typically cost?

    Roof replacement costs vary significantly based on roof size, material choice, pitch, and the amount of underlying repair needed, which is why a free on-site estimate is the most accurate way to get a number specific to your home. Homes requiring deck repair or structural work will cost more than straightforward tear-off-and-replace projects.

    Will my homeowner’s insurance help pay for a roof replacement?

    Insurance coverage for roof replacement depends on the cause of damage, your specific policy, and your deductible, with storm and wind damage typically covered while normal wear and aging usually are not. A professional inspection with documentation is the best first step before contacting your insurance provider about a potential claim.

    How long does a full roof replacement take to complete?

    Most residential roof replacements in the Charlotte and Fort Mill area are completed in one to three days, depending on roof size, pitch, material, and weather conditions during installation. Larger homes or roofs requiring significant deck repair may take longer.

    Is it cheaper to repair my roof multiple times or replace it once?

    Replacing a roof once is typically cheaper over time than multiple repeated repairs, especially once a roof is past 15 to 20 years old and repairs are becoming more frequent. A professional inspection can calculate your specific numbers and show which option offers better long-term value for your home.

    What’s the first thing I should do if I suspect my roof needs replacing?

    Schedule a professional roof inspection before making any decisions, since an experienced roofing contractor can accurately assess the roof’s condition and give you clear repair-versus-replacement guidance. Avoid climbing onto the roof yourself — a ground-level visual check is safe, but full evaluation requires professional equipment and training.


    Schedule Your Free Roof Inspection in Charlotte or Fort Mill

    At Blue Rock Roofing & Construction, we believe homeowners deserve honest recommendations, quality workmanship, and clear communication throughout every project. With more than 25 years serving the Carolinas, our experienced team will carefully inspect your roofing system and explain your options — repair or full replacement — without high-pressure sales tactics.

    We proudly serve homeowners throughout Fort Mill, Charlotte, Rock Hill, Lake Wylie, Waxhaw, Gastonia, Clover, Lancaster, Pineville, Weddington, and surrounding Mecklenburg and York County communities. Whether you’ve noticed one warning sign or several, our team at Blue Rock Roofing & Construction is ready to help you make an informed decision about your home’s protection.

    Call (704) 266-0448 today or contact us online to schedule your free roof inspection and estimate.